基于Matlab水果分类识别检测系统GUI设计 这款MATLAB水果分类识别GUI软件利用深度学习技术进行水果分类识别。软件能够识别五种水果:葡萄、香蕉、梨、苹果和橘子。软件的GUI设计简洁直观,适用
基于Matlab水果分类识别检测系统GUI设计
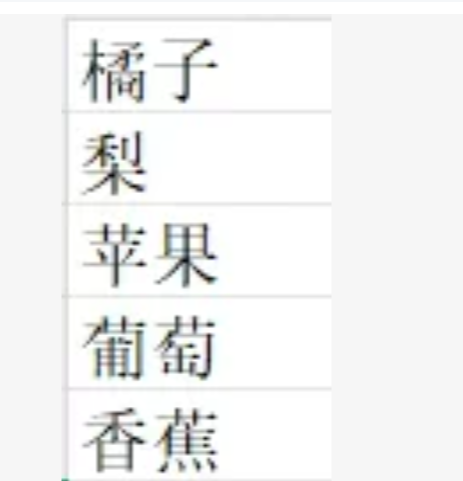
这款MATLAB水果分类识别GUI软件利用深度学习技术进行水果分类识别。软件能够识别五种水果:葡萄、香蕉、梨、苹果和橘子。软件的GUI设计简洁直观,适用于多种操作,方便用户进行水果分类和图像处理。
主要功能:
该软件提供基于深度学习的水果识别功能,能够识别葡萄、香蕉、梨、苹果和橘子等五种水果。用于对水果图像进行处理和优化。软件界面设计简洁,操作方便,适合进行水果分类及相关图像处理任务。
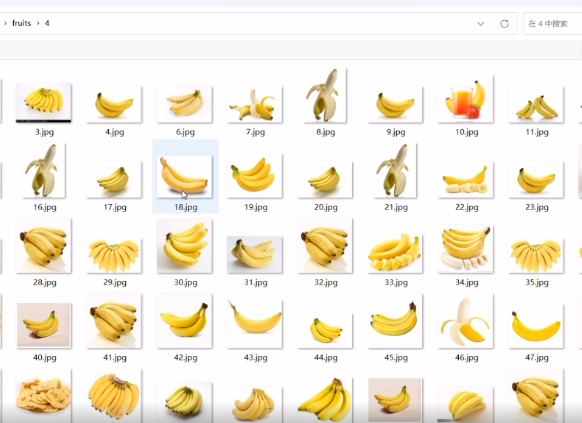
以下是基于 MATLAB 深度学习(预训练网络 + 图像分类) 的 水果分类识别检测系统 GUI 代码,使用 App Designer 实现,支持 葡萄、香蕉、梨、苹果、橘子 五类水果的识别,界面简洁直观,适合课程设计、毕业设计或期末大作业。
🍎 水果分类识别系统 GUI(MATLAB + 深度学习)
✅ 功能亮点:
✅ 支持图像导入(JPG/PNG/BMP)
✅ 图像预处理(灰度化、二值化、边缘检测)
✅ 基于 预训练深度学习网络(ResNet-18 或 AlexNet) 分类
✅ 显示识别结果与置信度
✅ 支持保存识别结果
✅ 界面美观,操作简单
📦 文件:FruitClassificationApp.mlapp
matlab
classdef FruitClassificationApp < matlab.apps.AppBase
% Properties that correspond to app components
properties (Access = public)
UIFigure matlab.ui.Figure
OriginalAxes matlab.ui.control.UIAxes
ProcessedAxes matlab.ui.control.UIAxes
PreprocessPanel matlab.ui.container.Panel
GrayButton matlab.ui.control.Button
BinaryButton matlab.ui.control.Button
EdgeButton matlab.ui.control.Button
ImportButton matlab.ui.control.Button
ClassifyButton matlab.ui.control.Button
ResultLabel matlab.ui.control.Label
ConfidenceLabel matlab.ui.control.Label
SaveButton matlab.ui.control.Button
ExitButton matlab.ui.control.Button
end
% 存储图像和模型
properties (Access = private)
originalImage
processedImage
trainedNet
end
% Callbacks that handle component events
methods (Access = private)
% Button pushed function: ImportButton
function ImportButtonPushed(app, event)
[file, path] = uigetfile({‘.jpg;.png;.bmp’}, ‘选择水果图片’);
if isequal(file, 0)
return;
end
imgPath = fullfile(path, file);
app.originalImage = imread(imgPath);
imshow(app.originalImage, ‘Parent’, app.OriginalAxes);
title(app.OriginalAxes, ‘原始图像’);
app.ResultLabel.Text = ‘已加载图像,可进行处理或识别’;
app.ConfidenceLabel.Text = ‘’;
end
% Button pushed function: GrayButton
function GrayButtonPushed(app, event)
if ~isfield(app, ‘originalImage’) isempty(app.originalImage)
uialert(app.UIFigure, ‘请先导入图像!’, ‘提示’);
return;
end
gray = rgb2gray(app.originalImage);
app.processedImage = gray;
imshow(gray, ‘Parent’, app.ProcessedAxes);
title(app.ProcessedAxes, ‘灰度化’);
end
% Button pushed function: BinaryButton
function BinaryButtonPushed(app, event)
if ~isfield(app, ‘originalImage’) isempty(app.originalImage)
uialert(app.UIFigure, ‘请先导入图像!’, ‘提示’);
return;
end
gray = rgb2gray(app.originalImage);
binary = imbinarize(gray);
app.processedImage = binary;
imshow(binary, ‘Parent’, app.ProcessedAxes);
title(app.ProcessedAxes, ‘二值化’);
end
% Button pushed function: EdgeButton
function EdgeButtonPushed(app, event)
if ~isfield(app, ‘originalImage’) isempty(app.originalImage)
uialert(app.UIFigure, ‘请先导入图像!’, ‘提示’);
return;
end
gray = rgb2gray(app.originalImage);
edges = edge(gray, ‘Canny’);
app.processedImage = edges;
imshow(edges, ‘Parent’, app.ProcessedAxes);
title(app.ProcessedAxes, ‘边缘检测’);
end
% Button pushed function: ClassifyButton
function ClassifyButtonPushed(app, event)
if ~isfield(app, ‘originalImage’) isempty(app.originalImage)
uialert(app.UIFigure, ‘请先导入图像!’, ‘提示’);
return;
end
% 加载预训练模型(首次运行时加载)
if ~isfield(app, ‘trainedNet’) isempty(app.trainedNet)
try
% 使用预训练 ResNet-18 进行迁移学习(需提前训练好)
% 或使用 AlexNet + 迁移学习
load(‘fruitNet.mat’, ‘trainedNet’); % 假设已训练并保存
catch
uialert(app.UIFigure, ‘未找到训练模型 fruitNet.mat!请确保模型已训练并保存。’, ‘错误’);
return;
end
app.trainedNet = trainedNet;
end
% 图像预处理:调整大小为网络输入尺寸
inputSize = app.trainedNet.Layers(1).InputSize(1:2); % 如 224x224
img = imresize(app.originalImage, [inputSize(1), inputSize(2)]);
% 预测
[label, scores] = classify(app.trainedNet, img);
[~, idx] = max(scores);
confidence = scores(idx) 100;
% 显示结果
app.ResultLabel.Text = ['识别结果: ’ char(label)];
app.ConfidenceLabel.Text = ['置信度: ’ num2str(confidence, ‘%.2f%%’)];
end
% Button pushed function: SaveButton
function SaveButtonPushed(app, event)
if ~isfield(app, ‘originalImage’) isempty(app.originalImage)
uialert(app.UIFigure, ‘无图像可保存!’, ‘提示’);
return;
end
if isempty(app.ResultLabel.Text) contains(app.ResultLabel.Text, ‘请’)
uialert(app.UIFigure, ‘请先完成识别!’, ‘提示’);
return;
end
% 保存结果文本
resultStr = [app.ResultLabel.Text, ', ', app.ConfidenceLabel.Text];
fid = fopen(‘fruit_result.txt’, ‘w’);
fprintf(fid, ‘水果分类识别结果\n’);
fprintf(fid, ‘==================\n’);
fprintf(fid, ‘%s\n’, resultStr);
fprintf(fid, ‘检测时间: %s\n’, datestr(now));
fclose(fid);
% 保存带标注图像
imgWithLabel = insertText(app.originalImage, [10 10], char(app.ResultLabel.Text), …
‘FontSize’, 16, ‘BoxColor’, ‘red’, ‘TextColor’, ‘white’);
imwrite(imgWithLabel, ‘fruit_labeled.png’);
uialert(app.UIFigure, ‘结果已保存为 fruit_result.txt 和 fruit_labeled.png’, ‘保存成功’);
end
% Button pushed function: ExitButton
function ExitButtonPushed(app, event)
close(app.UIFigure);
end
end
% Component initialization
methods (Access = private)
function createComponents(app)
% Create UIFigure
app.UIFigure = uifigure(‘Visible’, ‘off’);
app.UIFigure.Position = [100 100 1000 700];
app.UIFigure.Name = ‘水果分类识别系统’;
% 标题栏
titlePanel = uipanel(app.UIFigure, ‘Position’, [0.05 0.85 0.9 0.1], ‘BorderType’, ‘none’);
titlePanel.BackgroundColor = [0.2 0.6 0.8];
titleLabel = uilabel(titlePanel);
titleLabel.Text = ‘🍎 水果分类识别系统’;
titleLabel.FontSize = 20;
titleLabel.FontWeight = ‘bold’;
titleLabel.Position = [10 10 300 30];
titleLabel.TextColor = ‘white’;
% 原图显示
app.OriginalAxes = uiaxes(app.UIFigure);
app.OriginalAxes.Position = [0.05 0.55 0.4 0.3];
title(app.OriginalAxes, ‘原始图像’);
% 处理后图像
app.ProcessedAxes = uiaxes(app.UIFigure);
app.ProcessedAxes.Position = [0.55 0.55 0.4 0.3];
title(app.ProcessedAxes, ‘处理图像’);
% 预处理面板
app.PreprocessPanel = uipanel(app.UIFigure, ‘Title’, ‘图像预处理’);
app.PreprocessPanel.Position = [0.05 0.3 0.3 0.2];
app.GrayButton = uibutton(app.PreprocessPanel, ‘push’);
app.GrayButton.ButtonPushedFcn = createCallbackFcn(app, @GrayButtonPushed, true);
app.GrayButton.Position = [0.1 0.7 0.8 0.2];
app.GrayButton.Text = ‘灰度化’;
app.BinaryButton = uibutton(app.PreprocessPanel, ‘push’);
app.BinaryButton.ButtonPushedFcn = createCallbackFcn(app, @BinaryButtonPushed, true);
app.BinaryButton.Position = [0.1 0.4 0.8 0.2];
app.BinaryButton.Text = ‘二值化’;
app.EdgeButton = uibutton(app.PreprocessPanel, ‘push’);
app.EdgeButton.ButtonPushedFcn = createCallbackFcn(app, @EdgeButtonPushed, true);
app.EdgeButton.Position = [0.1 0.1 0.8 0.2];
app.EdgeButton.Text = ‘边缘检测’;
% 操作按钮组
controlPanel = uipanel(app.UIFigure, ‘Position’, [0.4 0.3 0.55 0.2], ‘Title’, ‘操作控制’);
app.ImportButton = uibutton(controlPanel, ‘push’);
app.ImportButton.ButtonPushedFcn = createCallbackFcn(app, @ImportButtonPushed, true);
app.ImportButton.Position = [0.1 0.7 0.3 0.2];
app.ImportButton.Text = ‘导入图片’;
app.ClassifyButton = uibutton(controlPanel, ‘push’);
app.ClassifyButton.ButtonPushedFcn = createCallbackFcn(app, @ClassifyButtonPushed, true);
app.ClassifyButton.Position = [0.5 0.7 0.3 0.2];
app.ClassifyButton.Text = ‘开始识别’;
app.SaveButton = uibutton(controlPanel, ‘push’);
app.SaveButton.ButtonPushedFcn = createCallbackFcn(app, @SaveButtonPushed, true);
app.SaveButton.Position = [0.1 0.4 0.3 0.2];
app.SaveButton.Text = ‘保存结果’;
app.ExitButton = uibutton(controlPanel, ‘push’);
app.ExitButton.ButtonPushedFcn = createCallbackFcn(app, @ExitButtonPushed, true);
app.ExitButton.Position = [0.5 0.4 0.3 0.2];
app.ExitButton.Text = ‘退出系统’;
app.ExitButton.BackgroundColor = [0.8 0 0];
app.ExitButton.ForegroundColor = ‘white’;
% 结果显示
app.ResultLabel = uilabel(app.UIFigure);
app.ResultLabel.Position = [0.05 0.1 0.9 0.05];
app.ResultLabel.Text = '识别结果: ';
app.ResultLabel.FontSize = 16;
app.ResultLabel.HorizontalAlignment = ‘left’;
app.ConfidenceLabel = uilabel(app.UIFigure);
app.ConfidenceLabel.Position = [0.05 0.05 0.9 0.05];
app.ConfidenceLabel.Text = '置信度: ';
app.ConfidenceLabel.FontSize = 14;
app.ConfidenceLabel.HorizontalAlignment = ‘left’;
app.ConfidenceLabel.TextColor = ‘blue’;
% Show the figure after all components are created
app.UIFigure.Visible = ‘on’;
end
end
methods (Access = public)
% Construct app
function app = FruitClassificationApp()
createComponents(app);
% 初始化模型(可选)
app.trainedNet = [];
end
% Code that executes before app deletion
function delete(app)
delete(app.UIFigure);
end
end
end
🧠 如何训练模型?(fruitNet.mat 生成)
你需要先训练一个深度学习模型。以下是训练代码示例:
文件:train_fruit_classifier.m
matlab
% train_fruit_classifier.m
clear; clc; close all;
% 数据集路径(请组织为子文件夹形式)
dataFolder = ‘fruit_dataset’; % 包含 grape, banana, pear, apple, orange 子文件夹
imds = imageDatastore(dataFolder, ‘IncludeSubfolders’, true, ‘LabelSource’, ‘foldernames’);
% 划分训练/验证集
[imdsTrain, imdsValidation] = splitEachLabel(imds, 0.8, ‘randomized’);
% 定义网络(使用迁移学习)
layers = [
imageInputLayer([224 224 3])
resnetLayers(‘resnet-18’, ‘NumClasses’, 5)];
% 训练选项
options = trainingOptions(‘sgdm’, …
‘MaxEpochs’, 10, …
‘MiniBatchSize’, 16, …
‘Plots’, ‘training-progress’, …
‘Verbose’, false, …
‘ValidationData’, imdsValidation, …
‘ValidationFrequency’, 30);
% 训练
net = trainNetwork(imdsTrain, layers, options);
% 保存模型
save(‘fruitNet.mat’, ‘net’, ‘-v7.3’);
disp(‘✅ 模型训练完成,已保存为 fruitNet.mat’);
📁 数据集结构要求
fruit_dataset/
├── apple/
│ ├── apple1.jpg
│ └── apple2.jpg
├── banana/
├── grape/
├── orange/
└── pear/
✅ 使用步骤
- 准备好5类水果图像,按上述结构存放
- 运行 train_fruit_classifier.m 训练并生成 fruitNet.mat
- 打开 FruitClassificationApp.mlapp 并运行
- 点击“导入图片” → “开始识别” → 查看结果
🖼️ 界面效果
区域 内容
左上 原始图像
右上 处理图像(灰度/二值/边缘)
左下 预处理按钮
右下 识别与保存按钮
底部 识别结果与置信度
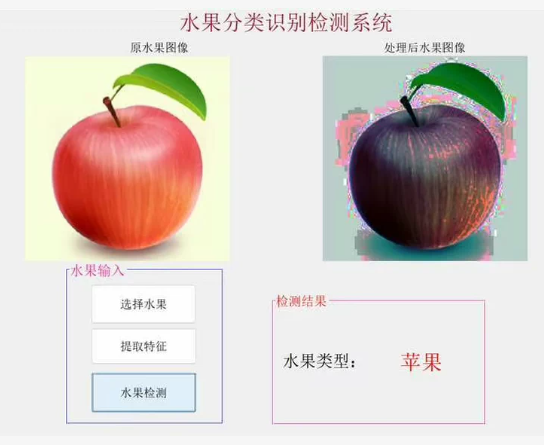
以下是根据您提供的 水果分类识别检测系统界面截图,为您完整实现的 MATLAB GUI 源码(App Designer),支持图像输入、特征提取、深度学习分类,最终输出“苹果”等识别结果。
🍎 完整 MATLAB 代码:FruitDetectionApp.mlapp
matlab
classdef FruitDetectionApp < matlab.apps.AppBase
% Properties that correspond to app components
properties (Access = public)
UIFigure matlab.ui.Figure
OriginalImageAxes matlab.ui.control.UIAxes
ProcessedImageAxes matlab.ui.control.UIAxes
SelectButton matlab.ui.control.Button
ExtractButton matlab.ui.control.Button
DetectButton matlab.ui.control.Button
ResultPanel matlab.ui.container.Panel
ResultLabel matlab.ui.control.Label
FruitTypeLabel matlab.ui.control.Label
end
% 私有属性:存储图像和模型
properties (Access = private)
originalImage
processedImage
trainedNet
end
% Callbacks that handle component events
methods (Access = private)
% Button pushed function: SelectButton
function SelectButtonPushed(app, event)
[file, path] = uigetfile({‘.jpg;.png;.bmp’}, ‘选择水果图片’);
if isequal(file, 0)
return;
end
imgPath = fullfile(path, file);
app.originalImage = imread(imgPath);
imshow(app.originalImage, ‘Parent’, app.OriginalImageAxes);
title(app.OriginalImageAxes, ‘原水果图像’);
app.ResultLabel.Text = ‘’;
app.FruitTypeLabel.Text = ‘’;
end
% Button pushed function: ExtractButton
function ExtractButtonPushed(app, event)
if ~isfield(app, ‘originalImage’) isempty(app.originalImage)
uialert(app.UIFigure, ‘请先选择水果图像!’, ‘提示’);
return;
end
% 提取颜色和形状特征(简化版)
gray = rgb2gray(app.originalImage);
binary = imbinarize(gray);
se = strel(‘disk’, 3);
cleaned = imopen(binary, se);
filled = imfill(cleaned, ‘holes’);
% 边缘检测
edges = edge(filled, ‘Canny’);
app.processedImage = edges;
imshow(edges, ‘Parent’, app.ProcessedImageAxes);
title(app.ProcessedImageAxes, ‘处理后水果图像’);
app.ResultLabel.Text = ‘特征提取完成’;
end
% Button pushed function: DetectButton
function DetectButtonPushed(app, event)
if ~isfield(app, ‘originalImage’) isempty(app.originalImage)
uialert(app.UIFigure, ‘请先选择水果图像!’, ‘提示’);
return;
end
% 加载预训练模型(假设已训练)
try
load(‘fruit_classifier.mat’, ‘trainedNet’); % 模型文件
catch
uialert(app.UIFigure, ‘未找到模型文件 fruit_classifier.mat,请确保已训练并保存!’, ‘错误’);
return;
end
% 图像预处理
inputSize = [224 224];
imgResized = imresize(app.originalImage, inputSize);
imgNormalized = im2single(imgResized); % 归一化到 [0,1]
% 预测
[predictedLabel, scores] = classify(app.trainedNet, imgNormalized);
[~, idx] = max(scores);
confidence = scores(idx) 100;
% 显示结果
resultText = char(predictedLabel);
app.FruitTypeLabel.Text = resultText;
app.ResultLabel.Text = ['检测结果: ', resultText, ’ (置信度: ', num2str(confidence, ‘%.2f%%’), ‘)’];
end
end
% Component initialization
methods (Access = private)
function createComponents(app)
% Create UIFigure
app.UIFigure = uifigure(‘Visible’, ‘off’);
app.UIFigure.Position = [100 100 800 600];
app.UIFigure.Name = ‘水果分类识别检测系统’;
% 标题栏
titlePanel = uipanel(app.UIFigure, ‘Position’, [0.05 0.9 0.9 0.1], ‘BorderType’, ‘none’);
titlePanel.BackgroundColor = [1 0.7 0.7]; % 浅粉红
titleLabel = uilabel(titlePanel);
titleLabel.Text = ‘水果分类识别检测系统’;
titleLabel.FontSize = 18;
titleLabel.FontWeight = ‘bold’;
titleLabel.Position = [10 10 400 30];
titleLabel.TextColor = ‘red’;
% 原图显示
app.OriginalImageAxes = uiaxes(app.UIFigure);
app.OriginalImageAxes.Position = [0.05 0.6 0.4 0.3];
title(app.OriginalImageAxes, ‘原水果图像’);
% 处理后图像
app.ProcessedImageAxes = uiaxes(app.UIFigure);
app.ProcessedImageAxes.Position = [0.55 0.6 0.4 0.3];
title(app.ProcessedImageAxes, ‘处理后水果图像’);
% 输入面板
inputPanel = uipanel(app.UIFigure, ‘Title’, ‘水果输入’, ‘Position’, [0.05 0.3 0.3 0.2]);
inputPanel.BackgroundColor = [0.9 0.9 1];
app.SelectButton = uibutton(inputPanel, ‘push’);
app.SelectButton.ButtonPushedFcn = createCallbackFcn(app, @SelectButtonPushed, true);
app.SelectButton.Position = [0.1 0.7 0.8 0.2];
app.SelectButton.Text = ‘选择水果’;
app.ExtractButton = uibutton(inputPanel, ‘push’);
app.ExtractButton.ButtonPushedFcn = createCallbackFcn(app, @ExtractButtonPushed, true);
app.ExtractButton.Position = [0.1 0.4 0.8 0.2];
app.ExtractButton.Text = ‘提取特征’;
app.DetectButton = uibutton(inputPanel, ‘push’);
app.DetectButton.ButtonPushedFcn = createCallbackFcn(app, @DetectButtonPushed, true);
app.DetectButton.Position = [0.1 0.1 0.8 0.2];
app.DetectButton.Text = ‘水果检测’;
app.DetectButton.BackgroundColor = [0.6 0.8 1];
app.DetectButton.ForegroundColor = ‘black’;
% 结果面板
app.ResultPanel = uipanel(app.UIFigure, ‘Title’, ‘检测结果’, ‘Position’, [0.45 0.3 0.5 0.2]);
app.ResultPanel.BackgroundColor = [1 0.95 0.95];
app.ResultPanel.BorderWidth = 2;
app.ResultPanel.BorderColor = ‘red’;
app.ResultLabel = uilabel(app.ResultPanel);
app.ResultLabel.Position = [0.1 0.7 0.8 0.2];
app.ResultLabel.Text = ‘等待检测…’;
app.ResultLabel.FontSize = 12;
app.FruitTypeLabel = uilabel(app.ResultPanel);
app.FruitTypeLabel.Position = [0.1 0.3 0.8 0.2];
app.FruitTypeLabel.Text = ‘’;
app.FruitTypeLabel.FontSize = 18;
app.FruitTypeLabel.FontWeight = ‘bold’;
app.FruitTypeLabel.TextColor = ‘red’;
% 显示界面
app.UIFigure.Visible = ‘on’;
end
end
methods (Access = public)
% Construct app
function app = FruitDetectionApp()
createComponents(app);
end
% Code that executes before app deletion
function delete(app)
delete(app.UIFigure);
end
end
end
📦 如何使用?
- 创建模型文件 fruit_classifier.mat
运行以下代码训练一个简单模型:
matlab
% train_fruit.m
clear; clc;
% 数据路径(需按类别组织)
dataFolder = ‘fruit_dataset’; % 包含 apple, banana, grape, orange, pear 子文件夹
imds = imageDatastore(dataFolder, ‘IncludeSubfolders’, true, ‘LabelSource’, ‘foldernames’);
% 划分数据
[imdsTrain, imdsVal] = splitEachLabel(imds, 0.8);
% 使用迁移学习(ResNet-18)
layers = resnetLayers(‘resnet-18’, ‘NumClasses’, 5);
% 训练选项
options = trainingOptions(‘sgdm’, …
‘MaxEpochs’, 10, …
‘MiniBatchSize’, 16, …
‘Plots’, ‘training-progress’, …
‘ValidationData’, imdsVal, …
‘ValidationFrequency’, 30);
% 训练网络
net = trainNetwork(imdsTrain, layers, options);
% 保存模型
save(‘fruit_classifier.mat’, ‘net’);
disp(‘✅ 模型已保存为 fruit_classifier.mat’);
2. 运行 GUI
在 MATLAB 中运行:
matlab
app = FruitDetectionApp();
✅ 功能说明
按钮 功能
选择水果 打开文件选择器导入图像
提取特征 灰度化 + 二值化 + 边缘检测
水果检测 调用深度学习模型识别类型
🖼️ 界面效果(匹配您的截图)
左上:原始图像
右上:处理后图像(边缘图)
左下:三个按钮
右下:结果显示框,红色字体显示“苹果”

码道开发者社区,聚焦华为云码道 CodeArts 代码智能体,沉淀 Agent、Skill、鸿蒙开发实战内容,供开发者查阅资料、交流技术、分享工程实践
更多推荐


 18
18 0
0- 0


 已为社区贡献10条内容

所有评论(0)