【centos8镜像+pg源码构建pg的docker镜像】
·
Dockerfile
将下面内容复制到Dockerfile文件中
# 使用CentOS 8作为基础镜像
FROM docker.1ms.run/centos:8

# 设置环境变量,方便后续维护
ENV PG_VERSION=14.19 \
    PG_HOME=/app/postgresql \
    PG_DATA=/data/pg_data \
    PG_WAL=/data/pg_wal \
    PGDATA=/data/pg_data

# 安装编译依赖和必要的软件包
# 替换为阿里云yum源并安装依赖
RUN sed -i 's/mirrorlist/#mirrorlist/g' /etc/yum.repos.d/CentOS-* && \
    sed -i 's|#baseurl=http://mirror.centos.org|baseurl=https://mirrors.aliyun.com/centos-vault|g' /etc/yum.repos.d/CentOS-* && \
    sed -i 's|baseurl=http://mirror.centos.org|baseurl=https://mirrors.aliyun.com/centos-vault|g' /etc/yum.repos.d/CentOS-* && \
    curl -o /etc/yum.repos.d/epel.repo https://mirrors.aliyun.com/repo/epel-archive-8.repo && \
    yum makecache && \
    yum install -y gcc make lz4-devel openssl-devel readline-devel systemd-sysv zlib-devel curl which && \
    yum clean all

# 创建postgres用户和所需目录,并设置权限
RUN groupadd -r postgres && useradd -r -g postgres -m -d /home/postgres postgres && \
    mkdir -p ${PG_HOME} ${PG_DATA} ${PG_WAL} && \
    chown -R postgres:postgres ${PG_HOME} ${PG_DATA} ${PG_WAL} /home/postgres

# 切换工作目录并下载PostgreSQL源码
WORKDIR /tmp
RUN curl -O https://ftp.postgresql.org/pub/source/v${PG_VERSION}/postgresql-${PG_VERSION}.tar.gz && \
    tar xvf postgresql-${PG_VERSION}.tar.gz && \
    rm postgresql-${PG_VERSION}.tar.gz

# 编译和安装PostgreSQL
WORKDIR /tmp/postgresql-${PG_VERSION}
RUN ./configure --prefix=${PG_HOME} --with-openssl --with-lz4 --with-blocksize=8 --with-wal-blocksize=8 && \
    make && \
    make install && \
    rm -rf /tmp/postgresql-${PG_VERSION}

# 将PostgreSQL二进制文件路径添加到PATH环境变量
ENV PATH="${PG_HOME}/bin:${PATH}" \
    LD_LIBRARY_PATH="${PG_HOME}/lib"

# 创建初始化脚本
RUN echo '#!/bin/bash' > /usr/local/bin/init-postgres.sh && \
    echo 'set -e' >> /usr/local/bin/init-postgres.sh && \
    echo 'if [ ! -f "$PGDATA/PG_VERSION" ]; then' >> /usr/local/bin/init-postgres.sh && \
    echo '    echo "Initializing PostgreSQL database..."' >> /usr/local/bin/init-postgres.sh && \
    echo '    # 使用无密码初始化' >> /usr/local/bin/init-postgres.sh && \
    echo '    initdb --pgdata=$PGDATA --waldir=$PG_WAL --encoding=UTF8 --username=postgres --auth=trust' >> /usr/local/bin/init-postgres.sh && \
    echo '    echo "host all all 0.0.0.0/0 trust" >> $PGDATA/pg_hba.conf' >> /usr/local/bin/init-postgres.sh && \
    echo '    echo "local all all trust" >> $PGDATA/pg_hba.conf' >> /usr/local/bin/init-postgres.sh && \
    echo '    echo "listen_addresses = '\''*'\''" >> $PGDATA/postgresql.conf' >> /usr/local/bin/init-postgres.sh && \
    echo '    echo "Database initialized successfully with trust authentication"' >> /usr/local/bin/init-postgres.sh && \
    echo 'else' >> /usr/local/bin/init-postgres.sh && \
    echo '    echo "Database already exists, skipping initialization"' >> /usr/local/bin/init-postgres.sh && \
    echo 'fi' >> /usr/local/bin/init-postgres.sh && \
    echo '' >> /usr/local/bin/init-postgres.sh && \
    echo '# 如果设置了密码,则更新密码' >> /usr/local/bin/init-postgres.sh && \
    echo 'if [ -n "$POSTGRES_PASSWORD" ]; then' >> /usr/local/bin/init-postgres.sh && \
    echo '    echo "Setting PostgreSQL password..."' >> /usr/local/bin/init-postgres.sh && \
    echo '    # 等待PostgreSQL启动' >> /usr/local/bin/init-postgres.sh && \
    echo '    sleep 2' >> /usr/local/bin/init-postgres.sh && \
    echo '    # 在后台启动PostgreSQL来设置密码' >> /usr/local/bin/init-postgres.sh && \
    echo '    postgres -D $PGDATA &' >> /usr/local/bin/init-postgres.sh && \
    echo '    PG_PID=$!' >> /usr/local/bin/init-postgres.sh && \
    echo '    sleep 3' >> /usr/local/bin/init-postgres.sh && \
    echo '    # 设置密码' >> /usr/local/bin/init-postgres.sh && \
    echo '    psql -U postgres -c "ALTER USER postgres WITH PASSWORD '\''$POSTGRES_PASSWORD'\'';"' >> /usr/local/bin/init-postgres.sh && \
    echo '    # 停止临时PostgreSQL进程' >> /usr/local/bin/init-postgres.sh && \
    echo '    kill $PG_PID' >> /usr/local/bin/init-postgres.sh && \
    echo '    wait $PG_PID' >> /usr/local/bin/init-postgres.sh && \
    echo '    echo "Password set successfully"' >> /usr/local/bin/init-postgres.sh && \
    echo 'fi' >> /usr/local/bin/init-postgres.sh && \
    echo '' >> /usr/local/bin/init-postgres.sh && \
    echo 'exec "$@"' >> /usr/local/bin/init-postgres.sh && \
    chmod +x /usr/local/bin/init-postgres.sh

# 切换至postgres用户进行后续操作
USER postgres

# 创建postgres用户的bashrc文件
RUN touch /home/postgres/.bashrc && \
    echo 'export PATH="/app/postgresql/bin:$PATH"' >> /home/postgres/.bashrc && \
    echo 'export PGDATA=/data/pg_data' >> /home/postgres/.bashrc && \
    echo 'alias psql-local="psql -U postgres -d postgres"' >> /home/postgres/.bashrc

# 暴露PostgreSQL默认端口
EXPOSE 5432

# 设置入口点脚本
ENTRYPOINT ["/usr/local/bin/init-postgres.sh"]

# 定义默认启动命令
CMD ["postgres", "-D", "/data/pg_data", "-c", "config_file=/data/pg_data/postgresql.conf"]
脚本说明
- 使用了镜像加速,否则通过官网的仓库拉去centos8镜像是很困难的
- 特意设置了无密码登录,目的是测试,不用做生产
- 构建时使用了阿里云的yum源,如源失效,需要自行修改
- 宿主机需要能联网,否则上述操作执行会失败
执行构建命令
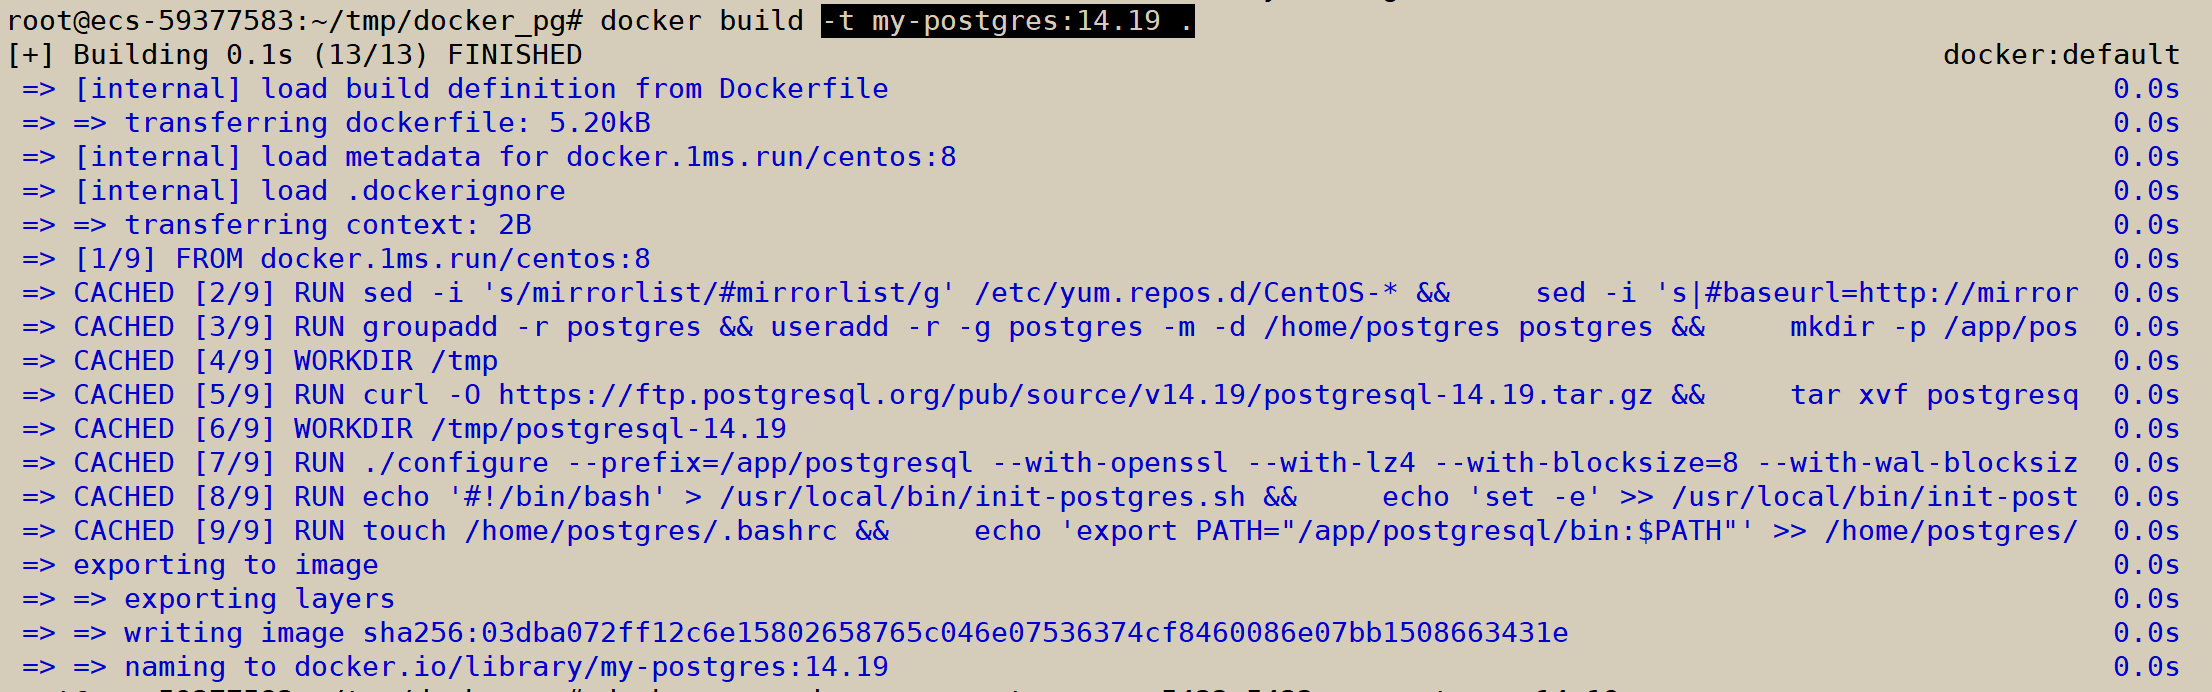
docker build -t my-postgres:14.19 .
运行成功界面截图示例
启动容器
docker run -d --name postgres -p 5432:5432 my-postgres:14.19
进入容器
docker exec -it postgres bash
进入pg数据库
psql

码道开发者社区,聚焦华为云码道 CodeArts 代码智能体,沉淀 Agent、Skill、鸿蒙开发实战内容,供开发者查阅资料、交流技术、分享工程实践
更多推荐



 5
5 0
0- 0


 已为社区贡献1条内容

所有评论(0)