rometheus(18):通过prometheus在centos7监控docker容器
·
一 安装docker
1.1 更新yum源
vim /etc/yum.repos.d/docker-ce.repo
修改第一个源为
[docker-ce-stable]
name=Docker CE Stable - x86_64
baseurl=https://mirrors.aliyun.com/docker-ce/linux/centos/9/x86_64/stable/
enabled=1
gpgcheck=1
gpgkey=https://mirrors.aliyun.com/docker-ce/linux/centos/gpg
1.2 找docker镜像的仓库
我这里选择了轩辕镜像的免费版
vim /etc/docker/daemon.json
然后选择这个轩辕镜像
{
  "registry-mirrors": ["https://docker.xuanyuan.me"]
}
1.3 rocky采用的是二代CPU内核的形式
1.3.1 centos7
[root@centos7-3 scripts]# stat -fc %T /sys/fs/cgroup/
tmpfs
您在 /var/spool/mail/root 中有新邮件
[root@centos7-3 scripts]#
1.3.2 rocky9
[root@rocky9-1 ~]# stat -fc %T /sys/fs/cgroup/
cgroup2fs
1.3.3 最后采用tmps架构的centos7。部署docker和cAdvisor
#!/bin/bash
###########################################
# File Name: install_docker_cadvisor_centos7.sh
# Version: V1.0
# Author: oldboy lidao996
# Organization: www.oldboyedu.com
# Desc:
###########################################
# CentOS 7 Docker 安装和 cAdvisor 部署脚本
# 适用于 CentOS 7 系统

set -e  # 遇到错误时退出

echo "=== CentOS 7 Docker 安装和 cAdvisor 部署脚本 ==="

# 检查是否为 root 用户
if [ "$EUID" -ne 0 ]; then
    echo "请以 root 用户运行此脚本"
    exit 1
fi

# 检查系统版本
if ! grep -q "CentOS Linux release 7" /etc/redhat-release 2>/dev/null; then
    echo "警告: 此脚本专为 CentOS 7 设计,当前系统可能不兼容"
    read -p "是否继续执行? (y/n): " -n 1 -r
    echo
    if [[ ! $REPLY =~ ^[Yy]$ ]]; then
        exit 1
    fi
fi

echo "步骤 1: 卸载旧版本 Docker(如果存在)"
yum remove -y docker \
    docker-client \
    docker-client-latest \
    docker-common \
    docker-latest \
    docker-latest-logrotate \
    docker-logrotate \
    docker-engine 2>/dev/null || true

echo "步骤 2: 安装必要的工具包"
yum install -y yum-utils \
    device-mapper-persistent-data \
    lvm2 \
    wget \
    curl

echo "步骤 3: 添加 Docker CE 仓库(使用阿里云镜像)"
cat > /etc/yum.repos.d/docker-ce.repo << 'EOF'
[docker-ce-stable]
name=Docker CE Stable - x86_64
baseurl=https://mirrors.aliyun.com/docker-ce/linux/centos/7/x86_64/stable/
enabled=1
gpgcheck=1
gpgkey=https://mirrors.aliyun.com/docker-ce/linux/centos/gpg

[docker-ce-stable-debuginfo]
name=Docker CE Stable - Debuginfo x86_64
baseurl=https://mirrors.aliyun.com/docker-ce/linux/centos/7/debug-x86_64/stable/
enabled=0
gpgcheck=1
gpgkey=https://mirrors.aliyun.com/docker-ce/linux/centos/gpg

[docker-ce-stable-source]
name=Docker CE Stable - Sources
baseurl=https://mirrors.aliyun.com/docker-ce/linux/centos/7/source/stable/
enabled=0
gpgcheck=1
gpgkey=https://mirrors.aliyun.com/docker-ce/linux/centos/gpg

[docker-ce-test]
name=Docker CE Test - x86_64
baseurl=https://mirrors.aliyun.com/docker-ce/linux/centos/7/x86_64/test/
enabled=0
gpgcheck=1
gpgkey=https://mirrors.aliyun.com/docker-ce/linux/centos/gpg

[docker-ce-test-debuginfo]
name=Docker CE Test - Debuginfo x86_64
baseurl=https://mirrors.aliyun.com/docker-ce/linux/centos/7/debug-x86_64/test/
enabled=0
gpgcheck=1
gpgkey=https://mirrors.aliyun.com/docker-ce/linux/centos/gpg

[docker-ce-test-source]
name=Docker CE Test - Sources
baseurl=https://mirrors.aliyun.com/docker-ce/linux/centos/7/source/test/
enabled=0
gpgcheck=1
gpgkey=https://mirrors.aliyun.com/docker-ce/linux/centos/gpg

[docker-ce-nightly]
name=Docker CE Nightly - x86_64
baseurl=https://mirrors.aliyun.com/docker-ce/linux/centos/7/x86_64/nightly/
enabled=0
gpgcheck=1
gpgkey=https://mirrors.aliyun.com/docker-ce/linux/centos/gpg

[docker-ce-nightly-debuginfo]
name=Docker CE Nightly - Debuginfo x86_64
baseurl=https://mirrors.aliyun.com/docker-ce/linux/centos/7/debug-x86_64/nightly/
enabled=0
gpgcheck=1
gpgkey=https://mirrors.aliyun.com/docker-ce/linux/centos/gpg

[docker-ce-nightly-source]
name=Docker CE Nightly - Sources
baseurl=https://mirrors.aliyun.com/docker-ce/linux/centos/7/source/nightly/
enabled=0
gpgcheck=1
gpgkey=https://mirrors.aliyun.com/docker-ce/linux/centos/gpg
EOF

echo "步骤 4: 更新 yum 缓存"
yum clean all
yum makecache fast

echo "步骤 5: 安装 Docker CE"
yum install -y docker-ce docker-ce-cli containerd.io docker-buildx-plugin docker-compose-plugin

echo "步骤 6: 配置 Docker 镜像加速器"
mkdir -p /etc/docker

# 创建 daemon.json 配置文件(包含多个镜像源以提高可用性)
cat > /etc/docker/daemon.json << 'EOF'
{
  "registry-mirrors": [
    "https://docker.xuanyuan.me",
    "https://registry.docker-cn.com",
    "https://docker.mirrors.ustc.edu.cn",
    "https://hub-mirror.c.163.com",
    "https://mirror.baidubce.com"
  ],
  "log-driver": "json-file",
  "log-opts": {
    "max-size": "100m",
    "max-file": "3"
  },
  "storage-driver": "overlay2"
}
EOF

echo "步骤 7: 启动并启用 Docker 服务"
systemctl daemon-reload
systemctl start docker
systemctl enable docker

echo "步骤 8: 验证 Docker 安装"
docker --version
docker info

echo "步骤 9: 测试 Docker 运行"
docker run --rm hello-world

echo "步骤 10: 检查 cgroup 版本(CentOS 7 通常使用 cgroups v1)"
if [ -f /sys/fs/cgroup/memory/memory.stat ]; then
    echo "检测到 cgroups v1,适合运行 cAdvisor"
    CGROUP_VERSION="v1"
else
    echo "检测到 cgroups v2 或其他版本"
    CGROUP_VERSION="v2"
fi

echo "步骤 11: 部署 cAdvisor 容器"

# 停止并删除已存在的 cAdvisor 容器(如果存在)
docker stop cadvisor 2>/dev/null || true
docker rm cadvisor 2>/dev/null || true

# 根据 cgroup 版本选择合适的 cAdvisor 部署方式
if [ "$CGROUP_VERSION" = "v1" ]; then
    echo "使用适用于 cgroups v1 的 cAdvisor 配置"
    docker run \
        --name=cadvisor \
        --restart=always \
        --detach=true \
        --privileged \
        --volume=/:/rootfs:ro \
        --volume=/var/run:/var/run:ro \
        --volume=/sys:/sys:ro \
        --volume=/var/lib/docker/:/var/lib/docker:ro \
        --volume=/dev/disk/:/dev/disk:ro \
        --publish=8080:8080 \
        google/cadvisor:latest
else
    echo "使用适用于 cgroups v2 的 cAdvisor 配置"
    docker run \
        --name=cadvisor \
        --restart=always \
        --detach=true \
        --privileged \
        --volume=/:/rootfs:ro \
        --volume=/var/run:/var/run:ro \
        --volume=/sys:/sys:ro \
        --volume=/var/lib/docker/:/var/lib/docker:ro \
        --volume=/dev/disk/:/dev/disk:ro \
        --volume=/proc:/host/proc:ro \
        --publish=8080:8080 \
        google/cadvisor:v0.47.0
fi

echo "步骤 12: 等待 cAdvisor 启动"
sleep 10

echo "步骤 13: 检查 cAdvisor 状态"
if docker ps | grep -q cadvisor; then
    echo "✅ cAdvisor 容器运行正常"
    docker ps | grep cadvisor

    echo "步骤 14: 测试 cAdvisor Web 界面"
    if curl -f -s http://localhost:8080 > /dev/null; then
        echo "✅ cAdvisor Web 界面可以正常访问"
        echo "     请在浏览器中访问: http://$(hostname -I | awk '{print $1}'):8080"
    else
        echo "⚠️  cAdvisor Web 界面暂时无法访问,可能还在启动中"
        echo "请稍后手动检查: curl http://localhost:8080"
    fi

    echo "步骤 15: 显示 cAdvisor 日志(最后10行)"
    echo "--- cAdvisor 日志 ---"
    docker logs --tail 10 cadvisor

else
    echo "❌ cAdvisor 容器启动失败"
    echo "--- cAdvisor 日志 ---"
    docker logs cadvisor
    exit 1
fi

echo ""
echo "=== 安装完成 ==="
echo "Docker 版本: $(docker --version)"
echo "cAdvisor 访问地址: http://$(hostname -I | awk '{print $1}'):8080"
echo ""
echo "常用命令:"
echo "  查看容器状态: docker ps"
echo "  查看 cAdvisor 日志: docker logs cadvisor"
echo "  重启 cAdvisor: docker restart cadvisor"
echo "  停止 cAdvisor: docker stop cadvisor"
echo "  启动 cAdvisor: docker start cadvisor"
echo ""
echo "如果遇到问题,请检查:"
echo "  1. 防火墙设置: firewall-cmd --list-ports"
echo "  2. SELinux 状态: getenforce"
echo "  3. Docker 服务状态: systemctl status docker"
二 下载
要监控docker状态,需要使用一个软件cAdvisor
cadvisor不仅可以搜集一台机器上所有运行的容器信息,还提供基础查询界面和http接口,方便其他组件如Prometheus进行数据抓取。
2.1 拉镜像的日志
在脚本里面已经拉下来了镜像
[root@centos7-3 scripts]# vim install_docker_cadvisor_centos7.sh
[root@centos7-3 scripts]# chmod +x install_docker_cadvisor_centos7.sh
[root@centos7-3 scripts]# /install_docker_cadvisor_centos7.sh
-bash: /install_docker_cadvisor_centos7.sh: 没有那个文件或目录
[root@centos7-3 scripts]# ./install_docker_cadvisor_centos7.sh
=== CentOS 7 Docker 安装和 cAdvisor 部署脚本 ===
步骤 1: 卸载旧版本 Docker(如果存在)
已加载插件:fastestmirror
不删除任何软件包
步骤 2: 安装必要的工具包
已加载插件:fastestmirror
Determining fastest mirrors
* base: mirrors.aliyun.com
* extras: mirrors.aliyun.com
* updates: mirrors.aliyun.com
base | 3.6 kB 00:00:00
extras | 2.9 kB 00:00:00
mysql-connectors-community | 2.6 kB 00:00:00
mysql-tools-community | 2.6 kB 00:00:00
mysql56-community | 2.6 kB 00:00:01
updates | 2.9 kB 00:00:00
软件包 wget-1.14-18.el7_6.1.x86_64 已安装并且是最新版本
正在解决依赖关系
--> 正在检查事务
---> 软件包 curl.x86_64.0.7.29.0-59.el7 将被 升级
---> 软件包 curl.x86_64.0.7.29.0-59.el7_9.2 将被 更新
--> 正在处理依赖关系 libcurl = 7.29.0-59.el7_9.2,它被软件包 curl-7.29.0-59.el7_9.2.x86_64 需要
---> 软件包 device-mapper-persistent-data.x86_64.0.0.8.5-3.el7 将被 升级
---> 软件包 device-mapper-persistent-data.x86_64.0.0.8.5-3.el7_9.2 将被 更新
---> 软件包 lvm2.x86_64.7.2.02.187-6.el7 将被 升级
---> 软件包 lvm2.x86_64.7.2.02.187-6.el7_9.5 将被 更新
--> 正在处理依赖关系 lvm2-libs = 7:2.02.187-6.el7_9.5,它被软件包 7:lvm2-2.02.187-6.el7_9.5.x86_64 需要
---> 软件包 yum-utils.noarch.0.1.1.31-54.el7_8 将被 安装
--> 正在处理依赖关系 python-kitchen,它被软件包 yum-utils-1.1.31-54.el7_8.noarch 需要
--> 正在处理依赖关系 libxml2-python,它被软件包 yum-utils-1.1.31-54.el7_8.noarch 需要
--> 正在检查事务
---> 软件包 libcurl.x86_64.0.7.29.0-59.el7 将被 升级
---> 软件包 libcurl.x86_64.0.7.29.0-59.el7_9.2 将被 更新
---> 软件包 libxml2-python.x86_64.0.2.9.1-6.el7_9.6 将被 安装
--> 正在处理依赖关系 libxml2 = 2.9.1-6.el7_9.6,它被软件包 libxml2-python-2.9.1-6.el7_9.6.x86_64 需要
---> 软件包 lvm2-libs.x86_64.7.2.02.187-6.el7 将被 升级
---> 软件包 lvm2-libs.x86_64.7.2.02.187-6.el7_9.5 将被 更新
--> 正在处理依赖关系 device-mapper-event = 7:1.02.170-6.el7_9.5,它被软件包 7:lvm2-libs-2.02.187-6.el7_9.5.x86_64 需要
---> 软件包 python-kitchen.noarch.0.1.1.1-5.el7 将被 安装
--> 正在处理依赖关系 python-chardet,它被软件包 python-kitchen-1.1.1-5.el7.noarch 需要
--> 正在检查事务
---> 软件包 device-mapper-event.x86_64.7.1.02.170-6.el7 将被 升级
---> 软件包 device-mapper-event.x86_64.7.1.02.170-6.el7_9.5 将被 更新
--> 正在处理依赖关系 device-mapper-event-libs = 7:1.02.170-6.el7_9.5,它被软件包 7:device-mapper-event-1.02.170-6.el7_9.5.x86_64 需要
--> 正在处理依赖关系 device-mapper = 7:1.02.170-6.el7_9.5,它被软件包 7:device-mapper-event-1.02.170-6.el7_9.5.x86_64 需要
---> 软件包 libxml2.x86_64.0.2.9.1-6.el7.5 将被 升级
---> 软件包 libxml2.x86_64.0.2.9.1-6.el7_9.6 将被 更新
---> 软件包 python-chardet.noarch.0.2.2.1-3.el7 将被 安装
--> 正在检查事务
---> 软件包 device-mapper.x86_64.7.1.02.170-6.el7 将被 升级
--> 正在处理依赖关系 device-mapper = 7:1.02.170-6.el7,它被软件包 7:device-mapper-libs-1.02.170-6.el7.x86_64 需要
---> 软件包 device-mapper.x86_64.7.1.02.170-6.el7_9.5 将被 更新
---> 软件包 device-mapper-event-libs.x86_64.7.1.02.170-6.el7 将被 升级
---> 软件包 device-mapper-event-libs.x86_64.7.1.02.170-6.el7_9.5 将被 更新
--> 正在检查事务
---> 软件包 device-mapper-libs.x86_64.7.1.02.170-6.el7 将被 升级
---> 软件包 device-mapper-libs.x86_64.7.1.02.170-6.el7_9.5 将被 更新
--> 解决依赖关系完成
依赖关系解决
==========================================================================================================================================================================================================
Package 架构 版本 源 大小
==========================================================================================================================================================================================================
正在安装:
yum-utils noarch 1.1.31-54.el7_8 base 122 k
正在更新:
curl x86_64 7.29.0-59.el7_9.2 updates 271 k
device-mapper-persistent-data x86_64 0.8.5-3.el7_9.2 updates 423 k
lvm2 x86_64 7:2.02.187-6.el7_9.5 updates 1.3 M
为依赖而安装:
libxml2-python x86_64 2.9.1-6.el7_9.6 updates 247 k
python-chardet noarch 2.2.1-3.el7 base 227 k
python-kitchen noarch 1.1.1-5.el7 base 267 k
为依赖而更新:
device-mapper x86_64 7:1.02.170-6.el7_9.5 updates 297 k
device-mapper-event x86_64 7:1.02.170-6.el7_9.5 updates 192 k
device-mapper-event-libs x86_64 7:1.02.170-6.el7_9.5 updates 192 k
device-mapper-libs x86_64 7:1.02.170-6.el7_9.5 updates 325 k
libcurl x86_64 7.29.0-59.el7_9.2 updates 223 k
libxml2 x86_64 2.9.1-6.el7_9.6 updates 668 k
lvm2-libs x86_64 7:2.02.187-6.el7_9.5 updates 1.1 M
事务概要
==========================================================================================================================================================================================================
安装 1 软件包 (+3 依赖软件包)
升级 3 软件包 (+7 依赖软件包)
总下载量:5.8 M
Downloading packages:
Delta RPMs disabled because /usr/bin/applydeltarpm not installed.
(1/14): curl-7.29.0-59.el7_9.2.x86_64.rpm | 271 kB 00:00:01
(2/14): device-mapper-event-libs-1.02.170-6.el7_9.5.x86_64.rpm | 192 kB 00:00:01
(3/14): device-mapper-persistent-data-0.8.5-3.el7_9.2.x86_64.rpm | 423 kB 00:00:00
(4/14): libcurl-7.29.0-59.el7_9.2.x86_64.rpm | 223 kB 00:00:00
(5/14): libxml2-python-2.9.1-6.el7_9.6.x86_64.rpm | 247 kB 00:00:00
(6/14): libxml2-2.9.1-6.el7_9.6.x86_64.rpm | 668 kB 00:00:00
(7/14): lvm2-libs-2.02.187-6.el7_9.5.x86_64.rpm | 1.1 MB 00:00:00
(8/14): lvm2-2.02.187-6.el7_9.5.x86_64.rpm | 1.3 MB 00:00:00
(9/14): python-chardet-2.2.1-3.el7.noarch.rpm | 227 kB 00:00:00
(10/14): yum-utils-1.1.31-54.el7_8.noarch.rpm | 122 kB 00:00:00
(11/14): python-kitchen-1.1.1-5.el7.noarch.rpm | 267 kB 00:00:00
device-mapper-event-1.02.170-6 FAILED
http://mirrors.cloud.aliyuncs.com/centos/7/updates/x86_64/Packages/device-mapper-event-1.02.170-6.el7_9.5.x86_64.rpm: [Errno 14] curl#7 - "Failed connect to mirrors.cloud.aliyuncs.com:80; Connection refused"
正在尝试其它镜像。
device-mapper-libs-1.02.170-6. FAILED
http://mirrors.aliyuncs.com/centos/7/updates/x86_64/Packages/device-mapper-libs-1.02.170-6.el7_9.5.x86_64.rpm: [Errno 14] curl#7 - "Failed connect to mirrors.aliyuncs.com:80; Connection refused":-- ETA
正在尝试其它镜像。
(12/14): device-mapper-event-1.02.170-6.el7_9.5.x86_64.rpm | 192 kB 00:00:00
(13/14): device-mapper-libs-1.02.170-6.el7_9.5.x86_64.rpm | 325 kB 00:00:00
device-mapper-1.02.170-6.el7_9 FAILED
http://mirrors.aliyuncs.com/centos/7/updates/x86_64/Packages/device-mapper-1.02.170-6.el7_9.5.x86_64.rpm: [Errno 14] curl#7 - "Failed connect to mirrors.aliyuncs.com:80; Connection refused"--:--:-- ETA
正在尝试其它镜像。
(14/14): device-mapper-1.02.170-6.el7_9.5.x86_64.rpm | 297 kB 00:00:00
----------------------------------------------------------------------------------------------------------------------------------------------------------------------------------------------------------
总计 208 kB/s | 5.8 MB 00:00:28
Running transaction check
Running transaction test
Transaction test succeeded
Running transaction
正在更新 : 7:device-mapper-1.02.170-6.el7_9.5.x86_64 1/24
正在更新 : 7:device-mapper-libs-1.02.170-6.el7_9.5.x86_64 2/24
正在更新 : 7:device-mapper-event-libs-1.02.170-6.el7_9.5.x86_64 3/24
正在更新 : 7:device-mapper-event-1.02.170-6.el7_9.5.x86_64 4/24
正在更新 : 7:lvm2-libs-2.02.187-6.el7_9.5.x86_64 5/24
正在安装 : python-chardet-2.2.1-3.el7.noarch 6/24
正在安装 : python-kitchen-1.1.1-5.el7.noarch 7/24
正在更新 : device-mapper-persistent-data-0.8.5-3.el7_9.2.x86_64 8/24
正在更新 : libcurl-7.29.0-59.el7_9.2.x86_64 9/24
正在更新 : libxml2-2.9.1-6.el7_9.6.x86_64 10/24
正在安装 : libxml2-python-2.9.1-6.el7_9.6.x86_64 11/24
正在安装 : yum-utils-1.1.31-54.el7_8.noarch 12/24
正在更新 : curl-7.29.0-59.el7_9.2.x86_64 13/24
正在更新 : 7:lvm2-2.02.187-6.el7_9.5.x86_64 14/24
清理 : 7:lvm2-2.02.187-6.el7.x86_64 15/24
清理 : 7:lvm2-libs-2.02.187-6.el7.x86_64 16/24
清理 : 7:device-mapper-event-1.02.170-6.el7.x86_64 17/24
清理 : 7:device-mapper-event-libs-1.02.170-6.el7.x86_64 18/24
清理 : 7:device-mapper-1.02.170-6.el7.x86_64 19/24
清理 : 7:device-mapper-libs-1.02.170-6.el7.x86_64 20/24
清理 : curl-7.29.0-59.el7.x86_64 21/24
清理 : libcurl-7.29.0-59.el7.x86_64 22/24
清理 : device-mapper-persistent-data-0.8.5-3.el7.x86_64 23/24
清理 : libxml2-2.9.1-6.el7.5.x86_64 24/24
验证中 : 7:device-mapper-event-1.02.170-6.el7_9.5.x86_64 1/24
验证中 : libxml2-2.9.1-6.el7_9.6.x86_64 2/24
验证中 : libcurl-7.29.0-59.el7_9.2.x86_64 3/24
验证中 : 7:device-mapper-libs-1.02.170-6.el7_9.5.x86_64 4/24
验证中 : device-mapper-persistent-data-0.8.5-3.el7_9.2.x86_64 5/24
验证中 : curl-7.29.0-59.el7_9.2.x86_64 6/24
验证中 : yum-utils-1.1.31-54.el7_8.noarch 7/24
验证中 : 7:lvm2-libs-2.02.187-6.el7_9.5.x86_64 8/24
验证中 : 7:device-mapper-event-libs-1.02.170-6.el7_9.5.x86_64 9/24
验证中 : 7:lvm2-2.02.187-6.el7_9.5.x86_64 10/24
验证中 : python-chardet-2.2.1-3.el7.noarch 11/24
验证中 : libxml2-python-2.9.1-6.el7_9.6.x86_64 12/24
验证中 : 7:device-mapper-1.02.170-6.el7_9.5.x86_64 13/24
验证中 : python-kitchen-1.1.1-5.el7.noarch 14/24
验证中 : 7:device-mapper-event-1.02.170-6.el7.x86_64 15/24
验证中 : libxml2-2.9.1-6.el7.5.x86_64 16/24
验证中 : 7:device-mapper-1.02.170-6.el7.x86_64 17/24
验证中 : 7:device-mapper-libs-1.02.170-6.el7.x86_64 18/24
验证中 : 7:device-mapper-event-libs-1.02.170-6.el7.x86_64 19/24
验证中 : libcurl-7.29.0-59.el7.x86_64 20/24
验证中 : 7:lvm2-libs-2.02.187-6.el7.x86_64 21/24
验证中 : curl-7.29.0-59.el7.x86_64 22/24
验证中 : 7:lvm2-2.02.187-6.el7.x86_64 23/24
验证中 : device-mapper-persistent-data-0.8.5-3.el7.x86_64 24/24
已安装:
yum-utils.noarch 0:1.1.31-54.el7_8
作为依赖被安装:
libxml2-python.x86_64 0:2.9.1-6.el7_9.6 python-chardet.noarch 0:2.2.1-3.el7 python-kitchen.noarch 0:1.1.1-5.el7
更新完毕:
curl.x86_64 0:7.29.0-59.el7_9.2 device-mapper-persistent-data.x86_64 0:0.8.5-3.el7_9.2 lvm2.x86_64 7:2.02.187-6.el7_9.5
作为依赖被升级:
device-mapper.x86_64 7:1.02.170-6.el7_9.5 device-mapper-event.x86_64 7:1.02.170-6.el7_9.5 device-mapper-event-libs.x86_64 7:1.02.170-6.el7_9.5 device-mapper-libs.x86_64 7:1.02.170-6.el7_9.5
libcurl.x86_64 0:7.29.0-59.el7_9.2 libxml2.x86_64 0:2.9.1-6.el7_9.6 lvm2-libs.x86_64 7:2.02.187-6.el7_9.5
完毕!
步骤 3: 添加 Docker CE 仓库(使用阿里云镜像)
步骤 4: 更新 yum 缓存
已加载插件:fastestmirror
正在清理软件源: base docker-ce-stable extras mysql-connectors-community mysql-tools-community mysql56-community updates
Cleaning up list of fastest mirrors
已加载插件:fastestmirror
Determining fastest mirrors
* base: mirrors.aliyun.com
* extras: mirrors.aliyun.com
* updates: mirrors.aliyun.com
base | 3.6 kB 00:00:00
docker-ce-stable | 3.5 kB 00:00:00
extras | 2.9 kB 00:00:00
mysql-connectors-community | 2.6 kB 00:00:00
mysql-tools-community | 2.6 kB 00:00:00
mysql56-community | 2.6 kB 00:00:00
updates | 2.9 kB 00:00:00
(1/9): base/7/x86_64/group_gz | 153 kB 00:00:01
(2/9): extras/7/x86_64/primary_db | 253 kB 00:00:01
(3/9): docker-ce-stable/primary_db | 152 kB 00:00:01
(4/9): base/7/x86_64/primary_db | 6.1 MB 00:00:03
(5/9): mysql-connectors-community/x86_64/primary_db | 82 kB 00:00:02
(6/9): mysql-tools-community/x86_64/primary_db | 81 kB 00:00:02
(7/9): mysql56-community/x86_64/primary_db | 338 kB 00:00:03
(8/9): updates/7/x86_64/primary_db | 27 MB 00:00:02
(9/9): docker-ce-stable/updateinfo | 55 B 00:00:06
元数据缓存已建立
步骤 5: 安装 Docker CE
已加载插件:fastestmirror
Loading mirror speeds from cached hostfile
* base: mirrors.aliyun.com
* extras: mirrors.aliyun.com
* updates: mirrors.aliyun.com
正在解决依赖关系
--> 正在检查事务
---> 软件包 containerd.io.x86_64.0.1.6.33-3.1.el7 将被 安装
--> 正在处理依赖关系 container-selinux >= 2:2.74,它被软件包 containerd.io-1.6.33-3.1.el7.x86_64 需要
---> 软件包 docker-buildx-plugin.x86_64.0.0.14.1-1.el7 将被 安装
---> 软件包 docker-ce.x86_64.3.26.1.4-1.el7 将被 安装
--> 正在处理依赖关系 docker-ce-rootless-extras,它被软件包 3:docker-ce-26.1.4-1.el7.x86_64 需要
--> 正在处理依赖关系 libcgroup,它被软件包 3:docker-ce-26.1.4-1.el7.x86_64 需要
---> 软件包 docker-ce-cli.x86_64.1.26.1.4-1.el7 将被 安装
---> 软件包 docker-compose-plugin.x86_64.0.2.27.1-1.el7 将被 安装
--> 正在检查事务
---> 软件包 container-selinux.noarch.2.2.119.2-1.911c772.el7_8 将被 安装
--> 正在处理依赖关系 policycoreutils-python,它被软件包 2:container-selinux-2.119.2-1.911c772.el7_8.noarch 需要
---> 软件包 docker-ce-rootless-extras.x86_64.0.26.1.4-1.el7 将被 安装
--> 正在处理依赖关系 fuse-overlayfs >= 0.7,它被软件包 docker-ce-rootless-extras-26.1.4-1.el7.x86_64 需要
--> 正在处理依赖关系 slirp4netns >= 0.4,它被软件包 docker-ce-rootless-extras-26.1.4-1.el7.x86_64 需要
---> 软件包 libcgroup.x86_64.0.0.41-21.el7 将被 安装
--> 正在检查事务
---> 软件包 fuse-overlayfs.x86_64.0.0.7.2-6.el7_8 将被 安装
--> 正在处理依赖关系 libfuse3.so.3(FUSE_3.2)(64bit),它被软件包 fuse-overlayfs-0.7.2-6.el7_8.x86_64 需要
--> 正在处理依赖关系 libfuse3.so.3(FUSE_3.0)(64bit),它被软件包 fuse-overlayfs-0.7.2-6.el7_8.x86_64 需要
--> 正在处理依赖关系 libfuse3.so.3()(64bit),它被软件包 fuse-overlayfs-0.7.2-6.el7_8.x86_64 需要
---> 软件包 policycoreutils-python.x86_64.0.2.5-34.el7 将被 安装
--> 正在处理依赖关系 setools-libs >= 3.3.8-4,它被软件包 policycoreutils-python-2.5-34.el7.x86_64 需要
--> 正在处理依赖关系 libsemanage-python >= 2.5-14,它被软件包 policycoreutils-python-2.5-34.el7.x86_64 需要
--> 正在处理依赖关系 audit-libs-python >= 2.1.3-4,它被软件包 policycoreutils-python-2.5-34.el7.x86_64 需要
--> 正在处理依赖关系 python-IPy,它被软件包 policycoreutils-python-2.5-34.el7.x86_64 需要
--> 正在处理依赖关系 libqpol.so.1(VERS_1.4)(64bit),它被软件包 policycoreutils-python-2.5-34.el7.x86_64 需要
--> 正在处理依赖关系 libqpol.so.1(VERS_1.2)(64bit),它被软件包 policycoreutils-python-2.5-34.el7.x86_64 需要
--> 正在处理依赖关系 libapol.so.4(VERS_4.0)(64bit),它被软件包 policycoreutils-python-2.5-34.el7.x86_64 需要
--> 正在处理依赖关系 checkpolicy,它被软件包 policycoreutils-python-2.5-34.el7.x86_64 需要
--> 正在处理依赖关系 libqpol.so.1()(64bit),它被软件包 policycoreutils-python-2.5-34.el7.x86_64 需要
--> 正在处理依赖关系 libapol.so.4()(64bit),它被软件包 policycoreutils-python-2.5-34.el7.x86_64 需要
---> 软件包 slirp4netns.x86_64.0.0.4.3-4.el7_8 将被 安装
--> 正在检查事务
---> 软件包 audit-libs-python.x86_64.0.2.8.5-4.el7 将被 安装
---> 软件包 checkpolicy.x86_64.0.2.5-8.el7 将被 安装
---> 软件包 fuse3-libs.x86_64.0.3.6.1-4.el7 将被 安装
---> 软件包 libsemanage-python.x86_64.0.2.5-14.el7 将被 安装
---> 软件包 python-IPy.noarch.0.0.75-6.el7 将被 安装
---> 软件包 setools-libs.x86_64.0.3.3.8-4.el7 将被 安装
--> 解决依赖关系完成
依赖关系解决
==========================================================================================================================================================================================================
Package 架构 版本 源 大小
==========================================================================================================================================================================================================
正在安装:
containerd.io x86_64 1.6.33-3.1.el7 docker-ce-stable 35 M
docker-buildx-plugin x86_64 0.14.1-1.el7 docker-ce-stable 14 M
docker-ce x86_64 3:26.1.4-1.el7 docker-ce-stable 27 M
docker-ce-cli x86_64 1:26.1.4-1.el7 docker-ce-stable 15 M
docker-compose-plugin x86_64 2.27.1-1.el7 docker-ce-stable 13 M
为依赖而安装:
audit-libs-python x86_64 2.8.5-4.el7 base 76 k
checkpolicy x86_64 2.5-8.el7 base 295 k
container-selinux noarch 2:2.119.2-1.911c772.el7_8 extras 40 k
docker-ce-rootless-extras x86_64 26.1.4-1.el7 docker-ce-stable 9.4 M
fuse-overlayfs x86_64 0.7.2-6.el7_8 extras 54 k
fuse3-libs x86_64 3.6.1-4.el7 extras 82 k
libcgroup x86_64 0.41-21.el7 base 66 k
libsemanage-python x86_64 2.5-14.el7 base 113 k
policycoreutils-python x86_64 2.5-34.el7 base 457 k
python-IPy noarch 0.75-6.el7 base 32 k
setools-libs x86_64 3.3.8-4.el7 base 620 k
slirp4netns x86_64 0.4.3-4.el7_8 extras 81 k
事务概要
==========================================================================================================================================================================================================
安装 5 软件包 (+12 依赖软件包)
总下载量:116 M
安装大小:407 M
Downloading packages:
(1/17): audit-libs-python-2.8.5-4.el7.x86_64.rpm | 76 kB 00:00:00
(2/17): checkpolicy-2.5-8.el7.x86_64.rpm | 295 kB 00:00:02
warning: /var/cache/yum/x86_64/7/docker-ce-stable/packages/docker-buildx-plugin-0.14.1-1.el7.x86_64.rpm: Header V4 RSA/SHA512 Signature, key ID 621e9f35: NOKEY ] 6.4 MB/s | 26 MB 00:00:14 ETA
docker-buildx-plugin-0.14.1-1.el7.x86_64.rpm 的公钥尚未安装
(3/17): docker-buildx-plugin-0.14.1-1.el7.x86_64.rpm | 14 MB 00:00:03
(4/17): container-selinux-2.119.2-1.911c772.el7_8.noarch.rpm | 40 kB 00:00:06
(5/17): containerd.io-1.6.33-3.1.el7.x86_64.rpm | 35 MB 00:00:07
(6/17): docker-ce-26.1.4-1.el7.x86_64.rpm | 27 MB 00:00:05
(7/17): docker-ce-cli-26.1.4-1.el7.x86_64.rpm | 15 MB 00:00:02
(8/17): docker-ce-rootless-extras-26.1.4-1.el7.x86_64.rpm | 9.4 MB 00:00:02
(9/17): libsemanage-python-2.5-14.el7.x86_64.rpm | 113 kB 00:00:00
(10/17): policycoreutils-python-2.5-34.el7.x86_64.rpm | 457 kB 00:00:00
(11/17): python-IPy-0.75-6.el7.noarch.rpm | 32 kB 00:00:00
(12/17): setools-libs-3.3.8-4.el7.x86_64.rpm | 620 kB 00:00:00
(13/17): libcgroup-0.41-21.el7.x86_64.rpm | 66 kB 00:00:01
(14/17): docker-compose-plugin-2.27.1-1.el7.x86_64.rpm | 13 MB 00:00:01
(15/17): fuse-overlayfs-0.7.2-6.el7_8.x86_64.rpm | 54 kB 00:00:02
(16/17): slirp4netns-0.4.3-4.el7_8.x86_64.rpm | 81 kB 00:00:00
(17/17): fuse3-libs-3.6.1-4.el7.x86_64.rpm | 82 kB 00:00:06
----------------------------------------------------------------------------------------------------------------------------------------------------------------------------------------------------------
总计 6.4 MB/s | 116 MB 00:00:18
从 https://mirrors.aliyun.com/docker-ce/linux/centos/gpg 检索密钥
导入 GPG key 0x621E9F35:
用户ID : "Docker Release (CE rpm) <docker@docker.com>"
指纹 : 060a 61c5 1b55 8a7f 742b 77aa c52f eb6b 621e 9f35
来自 : https://mirrors.aliyun.com/docker-ce/linux/centos/gpg
Running transaction check
Running transaction test
Transaction test succeeded
Running transaction
正在安装 : libcgroup-0.41-21.el7.x86_64 1/17
正在安装 : docker-buildx-plugin-0.14.1-1.el7.x86_64 2/17
正在安装 : setools-libs-3.3.8-4.el7.x86_64 3/17
正在安装 : audit-libs-python-2.8.5-4.el7.x86_64 4/17
正在安装 : slirp4netns-0.4.3-4.el7_8.x86_64 5/17
正在安装 : libsemanage-python-2.5-14.el7.x86_64 6/17
正在安装 : python-IPy-0.75-6.el7.noarch 7/17
正在安装 : fuse3-libs-3.6.1-4.el7.x86_64 8/17
正在安装 : fuse-overlayfs-0.7.2-6.el7_8.x86_64 9/17
正在安装 : checkpolicy-2.5-8.el7.x86_64 10/17
正在安装 : policycoreutils-python-2.5-34.el7.x86_64 11/17
正在安装 : 2:container-selinux-2.119.2-1.911c772.el7_8.noarch 12/17
setsebool: SELinux is disabled.
正在安装 : containerd.io-1.6.33-3.1.el7.x86_64 13/17
正在安装 : docker-compose-plugin-2.27.1-1.el7.x86_64 14/17
正在安装 : 1:docker-ce-cli-26.1.4-1.el7.x86_64 15/17
正在安装 : docker-ce-rootless-extras-26.1.4-1.el7.x86_64 16/17
正在安装 : 3:docker-ce-26.1.4-1.el7.x86_64 17/17
验证中 : docker-compose-plugin-2.27.1-1.el7.x86_64 1/17
验证中 : checkpolicy-2.5-8.el7.x86_64 2/17
验证中 : fuse3-libs-3.6.1-4.el7.x86_64 3/17
验证中 : python-IPy-0.75-6.el7.noarch 4/17
验证中 : fuse-overlayfs-0.7.2-6.el7_8.x86_64 5/17
验证中 : libsemanage-python-2.5-14.el7.x86_64 6/17
验证中 : slirp4netns-0.4.3-4.el7_8.x86_64 7/17
验证中 : 2:container-selinux-2.119.2-1.911c772.el7_8.noarch 8/17
验证中 : containerd.io-1.6.33-3.1.el7.x86_64 9/17
验证中 : 3:docker-ce-26.1.4-1.el7.x86_64 10/17
验证中 : 1:docker-ce-cli-26.1.4-1.el7.x86_64 11/17
验证中 : policycoreutils-python-2.5-34.el7.x86_64 12/17
验证中 : docker-ce-rootless-extras-26.1.4-1.el7.x86_64 13/17
验证中 : audit-libs-python-2.8.5-4.el7.x86_64 14/17
验证中 : setools-libs-3.3.8-4.el7.x86_64 15/17
验证中 : docker-buildx-plugin-0.14.1-1.el7.x86_64 16/17
验证中 : libcgroup-0.41-21.el7.x86_64 17/17
已安装:
containerd.io.x86_64 0:1.6.33-3.1.el7 docker-buildx-plugin.x86_64 0:0.14.1-1.el7 docker-ce.x86_64 3:26.1.4-1.el7 docker-ce-cli.x86_64 1:26.1.4-1.el7 docker-compose-plugin.x86_64 0:2.27.1-1.el7
作为依赖被安装:
audit-libs-python.x86_64 0:2.8.5-4.el7 checkpolicy.x86_64 0:2.5-8.el7 container-selinux.noarch 2:2.119.2-1.911c772.el7_8 docker-ce-rootless-extras.x86_64 0:26.1.4-1.el7
fuse-overlayfs.x86_64 0:0.7.2-6.el7_8 fuse3-libs.x86_64 0:3.6.1-4.el7 libcgroup.x86_64 0:0.41-21.el7 libsemanage-python.x86_64 0:2.5-14.el7
policycoreutils-python.x86_64 0:2.5-34.el7 python-IPy.noarch 0:0.75-6.el7 setools-libs.x86_64 0:3.3.8-4.el7 slirp4netns.x86_64 0:0.4.3-4.el7_8
完毕!
步骤 6: 配置 Docker 镜像加速器
步骤 7: 启动并启用 Docker 服务
Created symlink from /etc/systemd/system/multi-user.target.wants/docker.service to /usr/lib/systemd/system/docker.service.
步骤 8: 验证 Docker 安装
Docker version 26.1.4, build 5650f9b
Client: Docker Engine - Community
Version: 26.1.4
Context: default
Debug Mode: false
Plugins:
buildx: Docker Buildx (Docker Inc.)
Version: v0.14.1
Path: /usr/libexec/docker/cli-plugins/docker-buildx
compose: Docker Compose (Docker Inc.)
Version: v2.27.1
Path: /usr/libexec/docker/cli-plugins/docker-compose
Server:
Containers: 0
Running: 0
Paused: 0
Stopped: 0
Images: 0
Server Version: 26.1.4
Storage Driver: overlay2
Backing Filesystem: xfs
Supports d_type: true
Using metacopy: false
Native Overlay Diff: true
userxattr: false
Logging Driver: json-file
Cgroup Driver: cgroupfs
Cgroup Version: 1
Plugins:
Volume: local
Network: bridge host ipvlan macvlan null overlay
Log: awslogs fluentd gcplogs gelf journald json-file local splunk syslog
Swarm: inactive
Runtimes: io.containerd.runc.v2 runc
Default Runtime: runc
Init Binary: docker-init
containerd version: d2d58213f83a351ca8f528a95fbd145f5654e957
runc version: v1.1.12-0-g51d5e94
init version: de40ad0
Security Options:
seccomp
Profile: builtin
Kernel Version: 3.10.0-1160.el7.x86_64
Operating System: CentOS Linux 7 (Core)
OSType: linux
Architecture: x86_64
CPUs: 1
Total Memory: 972.3MiB
Name: centos7-3
ID: 21f0158e-3944-49a2-86ea-7baf70bfa3dd
Docker Root Dir: /var/lib/docker
Debug Mode: false
Experimental: false
Insecure Registries:
127.0.0.0/8
Registry Mirrors:
https://docker.xuanyuan.me/
https://registry.docker-cn.com/
https://docker.mirrors.ustc.edu.cn/
https://hub-mirror.c.163.com/
https://mirror.baidubce.com/
Live Restore Enabled: false
WARNING: bridge-nf-call-iptables is disabled
WARNING: bridge-nf-call-ip6tables is disabled
步骤 9: 测试 Docker 运行
Unable to find image 'hello-world:latest' locally
latest: Pulling from library/hello-world
17eec7bbc9d7: Pull complete
Digest: sha256:54e66cc1dd1fcb1c3c58bd8017914dbed8701e2d8c74d9262e26bd9cc1642d31
Status: Downloaded newer image for hello-world:latest
Hello from Docker!
This message shows that your installation appears to be working correctly.
To generate this message, Docker took the following steps:
1. The Docker client contacted the Docker daemon.
2. The Docker daemon pulled the "hello-world" image from the Docker Hub.
(amd64)
3. The Docker daemon created a new container from that image which runs the
executable that produces the output you are currently reading.
4. The Docker daemon streamed that output to the Docker client, which sent it
to your terminal.
To try something more ambitious, you can run an Ubuntu container with:
$ docker run -it ubuntu bash
Share images, automate workflows, and more with a free Docker ID:
https://hub.docker.com/
For more examples and ideas, visit:
https://docs.docker.com/get-started/
步骤 10: 检查 cgroup 版本(CentOS 7 通常使用 cgroups v1)
检测到 cgroups v1,适合运行 cAdvisor
步骤 11: 部署 cAdvisor 容器
使用适用于 cgroups v1 的 cAdvisor 配置
Unable to find image 'google/cadvisor:latest' locally
latest: Pulling from google/cadvisor
ff3a5c916c92: Pull complete
44a45bb65cdf: Pull complete
0bbe1a2fe2a6: Pull complete
Digest: sha256:815386ebbe9a3490f38785ab11bda34ec8dacf4634af77b8912832d4f85dca04
Status: Downloaded newer image for google/cadvisor:latest
325b8cf289f66bd7de14d9e5f5bdb2a261afaf8e18f56c027c3738f41cb0467c
步骤 12: 等待 cAdvisor 启动
步骤 13: 检查 cAdvisor 状态
✅ cAdvisor 容器运行正常
325b8cf289f6 google/cadvisor:latest "/usr/bin/cadvisor -…" 12 seconds ago Up 10 seconds 0.0.0.0:8080->8080/tcp, :::8080->8080/tcp cadvisor
步骤 14: 测试 cAdvisor Web 界面
✅ cAdvisor Web 界面可以正常访问
🌐 请在浏览器中访问: http://192.168.80.133:8080
步骤 15: 显示 cAdvisor 日志(最后10行)
--- cAdvisor 日志 ---
=== 安装完成 ===
Docker 版本: Docker version 26.1.4, build 5650f9b
cAdvisor 访问地址: http://192.168.80.133:8080
常用命令:
查看容器状态: docker ps
查看 cAdvisor 日志: docker logs cadvisor
重启 cAdvisor: docker restart cadvisor
停止 cAdvisor: docker stop cadvisor
启动 cAdvisor: docker start cadvisor
如果遇到问题,请检查:
1. 防火墙设置: firewall-cmd --list-ports
2. SELinux 状态: getenforce
3. Docker 服务状态: systemctl status docker
您在 /var/spool/mail/root 中有新邮件
[root@centos7-3 scripts]# stat -fc %T /sys/fs/cgroup/
tmpfs
您在 /var/spool/mail/root 中有新邮件
[root@centos7-3 scripts]#
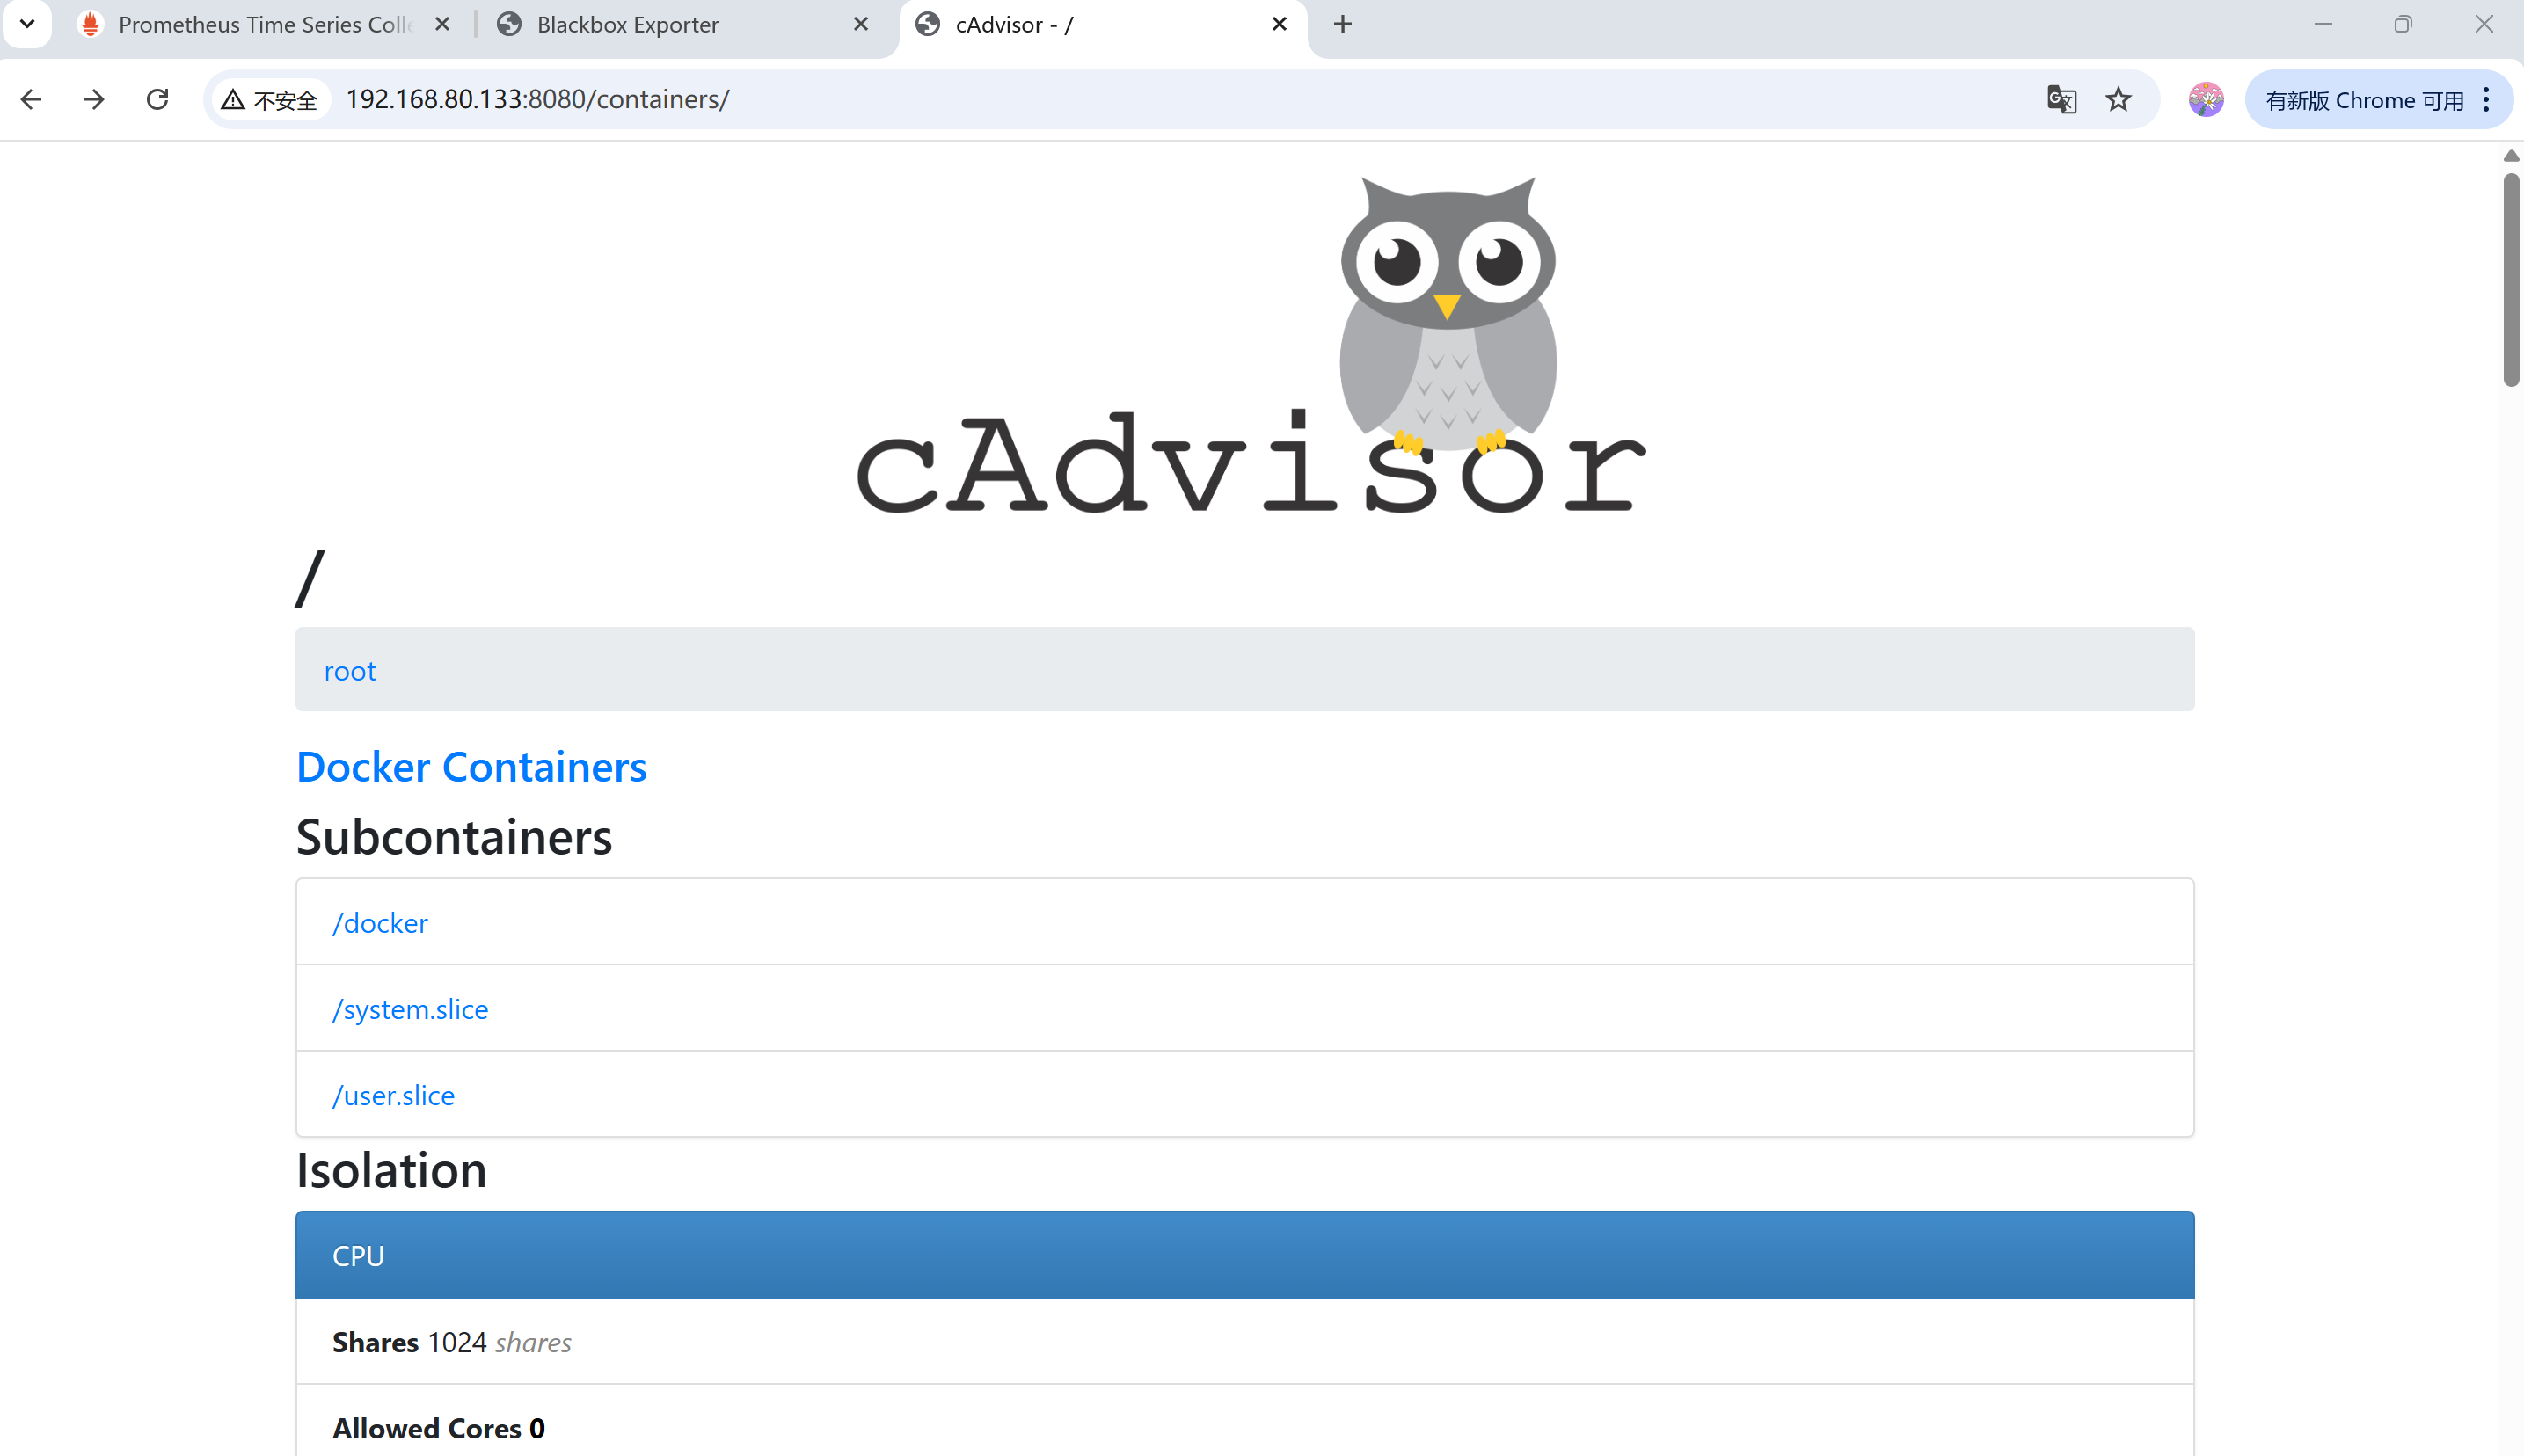
2.2 拉成功的界面
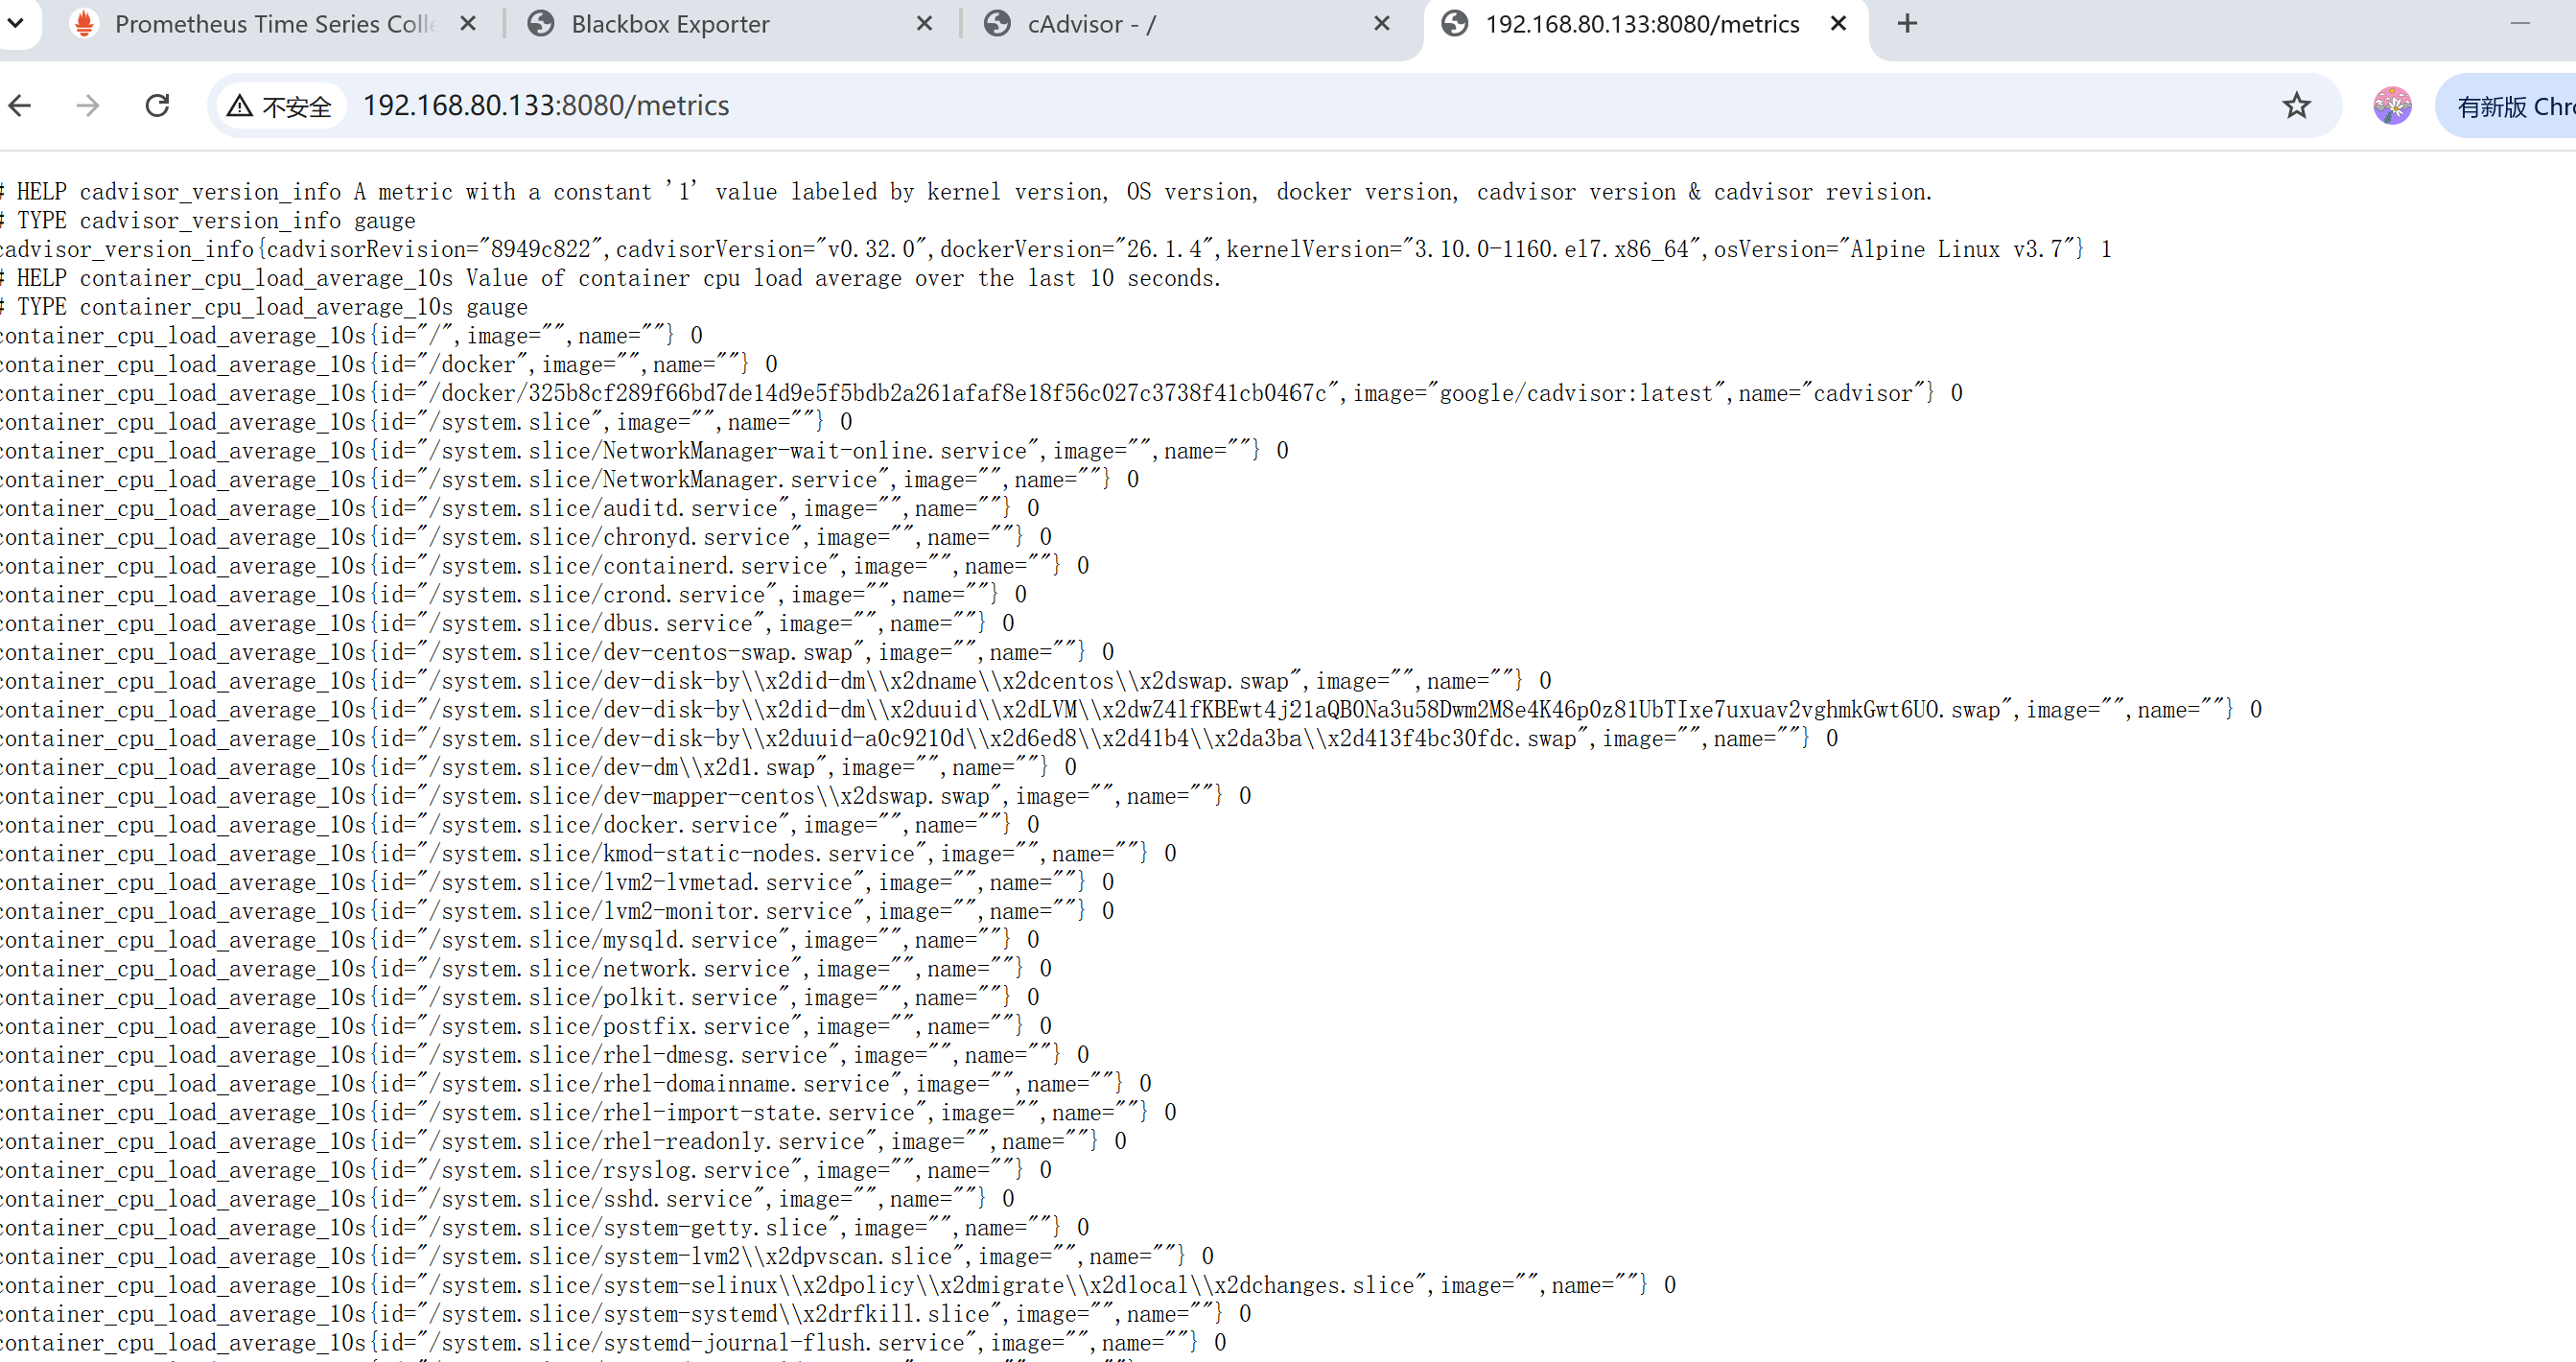
2.3 也有拉到监控的界面
http://192.168.80.133:8080/metrics
2.4 部署node-exporter监控主机
2.4.1 docker run拉镜像并运行
[root@centos7-3 scripts]# docker run -d \
>   --name=node-exporter \
>   --restart=always \
>   -p 9100:9100 \
>   -v /proc:/host/proc:ro \
>   -v /sys:/host/sys:ro \
>   -v /:/rootfs:ro \
>   prom/node-exporter \
>   --path.procfs=/host/proc \
>   --path.sysfs=/host/sys \
>   --collector.filesystem.ignored-mount-points="^/(sys|proc|dev|host|etc)($|/)"
2.4.2 检测服务是否启动
[root@centos7-3 scripts]# docker ps
CONTAINER ID   IMAGE                    COMMAND                   CREATED         STATUS         PORTS                                       NAMES
d567fe2d2859   prom/node-exporter       "/bin/node_exporter …"   9 seconds ago   Up 8 seconds   0.0.0.0:9100->9100/tcp, :::9100->9100/tcp   node-exporter
325b8cf289f6   google/cadvisor:latest   "/usr/bin/cadvisor -…"   2 hours ago     Up 2 hours     0.0.0.0:8080->8080/tcp, :::8080->8080/tcp   cadvisor
2.4.3 查看docker日志
[root@centos7-3 scripts]# docker logs node-exporter
time=2025-09-27T09:13:55.940Z level=INFO source=node_exporter.go:216 msg="Starting node_exporter" version="(version=1.9.1, branch=HEAD, revision=f2ec547b49af53815038a50265aa2adcd1275959)"
time=2025-09-27T09:13:55.940Z level=INFO source=node_exporter.go:217 msg="Build context" build_context="(go=go1.23.7, platform=linux/amd64, user=root@7023beaa563a, date=20250401-15:19:01, tags=unknown)"
time=2025-09-27T09:13:55.946Z level=INFO source=diskstats_common.go:110 msg="Parsed flag --collector.diskstats.device-exclude" collector=diskstats flag=^(z?ram|loop|fd|(h|s|v|xv)d[a-z]|nvme\d+n\d+p)\d+$
time=2025-09-27T09:13:55.946Z level=ERROR source=diskstats_linux.go:264 msg="Failed to open directory, disabling udev device properties" collector=diskstats path=/run/udev/data
time=2025-09-27T09:13:55.947Z level=WARN source=filesystem_common.go:248 msg="--collector.filesystem.ignored-mount-points is DEPRECATED and will be removed in 2.0.0, use --collector.filesystem.mount-points-exclude" collector=filesystem
time=2025-09-27T09:13:55.947Z level=INFO source=filesystem_common.go:265 msg="Parsed flag --collector.filesystem.mount-points-exclude" collector=filesystem flag=^/(sys|proc|dev|host|etc)($|/)
time=2025-09-27T09:13:55.947Z level=INFO source=filesystem_common.go:294 msg="Parsed flag --collector.filesystem.fs-types-exclude" collector=filesystem flag=^(autofs|binfmt_misc|bpf|cgroup2?|configfs|debugfs|devpts|devtmpfs|fusectl|hugetlbfs|iso9660|mqueue|nsfs|overlay|proc|procfs|pstore|rpc_pipefs|securityfs|selinuxfs|squashfs|sysfs|tracefs)$
time=2025-09-27T09:13:55.956Z level=INFO source=node_exporter.go:135 msg="Enabled collectors"
time=2025-09-27T09:13:55.956Z level=INFO source=node_exporter.go:141 msg=arp
2.4.4 查看是否能访问到9100端口
[root@centos7-3 scripts]# curl http://localhost:9100/metrics | head -10
  % Total    % Received % Xferd  Average Speed   Time    Time     Time  Current
                                 Dload  Upload   Total   Spent    Left  Speed
  0     0    0     0    0     0      0      0 --:--:-- --:--:-- --:--:--     0# HELP go_gc_duration_seconds A summary of the wall-time pause (stop-the-world) duration in garbage collection cycles.
# TYPE go_gc_duration_seconds summary
go_gc_duration_seconds{quantile="0"} 4.0474e-05
go_gc_duration_seconds{quantile="0.25"} 4.0474e-05
go_gc_duration_seconds{quantile="0.5"} 5.4415e-05
go_gc_duration_seconds{quantile="0.75"} 5.4415e-05
go_gc_duration_seconds{quantile="1"} 5.4415e-05
go_gc_duration_seconds_sum 9.4889e-05
go_gc_duration_seconds_count 2
# HELP go_gc_gogc_percent Heap size target percentage configured by the user, otherwise 100. This value is set by the GOGC environment variable, and the runtime/debug.SetGCPercent function. Sourced from /gc/gogc:percent
100 16168    0 16168    0     0   352k      0 --:--:-- --:--:-- --:--:--  358k
curl: (23) Failed writing body (0 != 2048)
2.4.5 查看web上访问node exporter界面
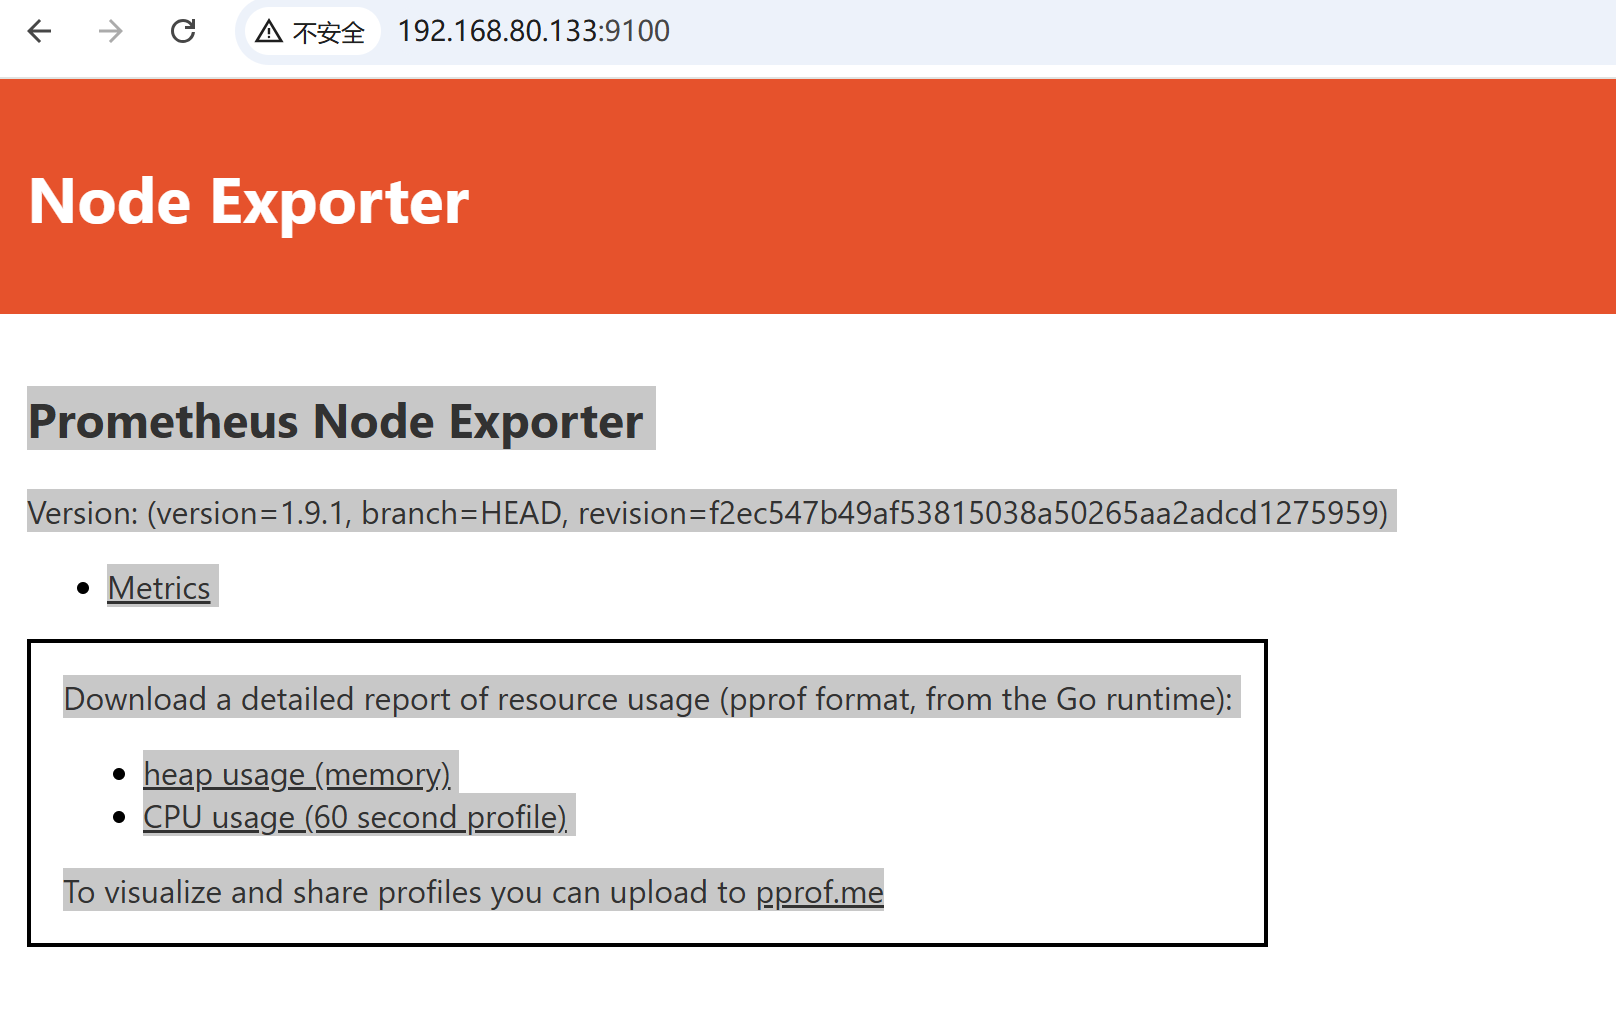
http://192.168.80.133:9100/metrics
点开metrics看的话。都是一些监控指标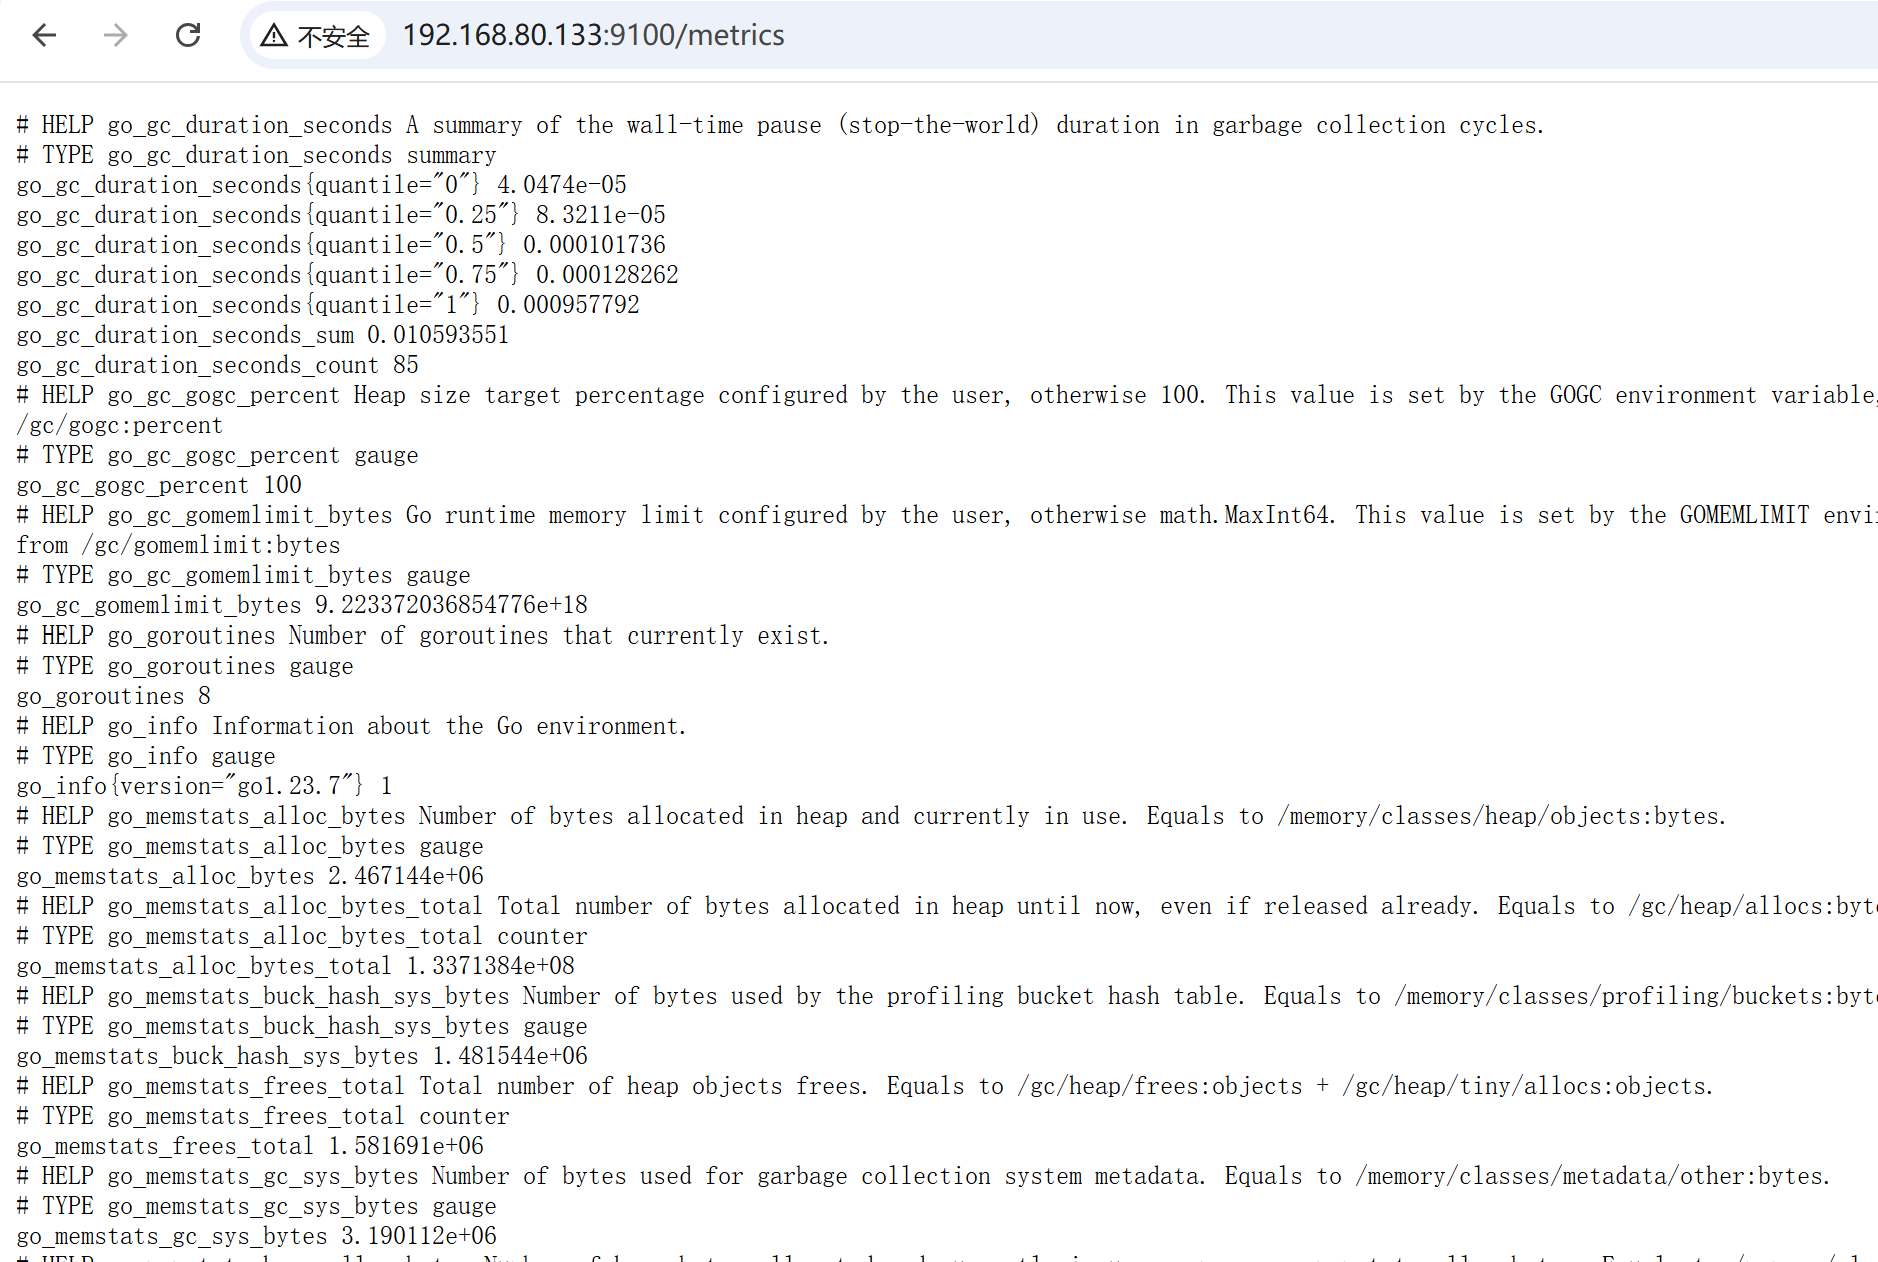
三 纳入prometheus
3.1 修改prometheus.yml
加入这次带检测的docker服务,prometheus的配置文件需要保持对齐
    # JOB 12:配置文件 添加了docker容器相关的检测
  - job_name: 'docker'
    static_configs:
     - targets: ['192.168.80.133:8080']
       labels:
         instance: docker-test
配置完成,重启prometheus
采用优雅重启的方式
curl -X POST http://localhost:9090/-/reload
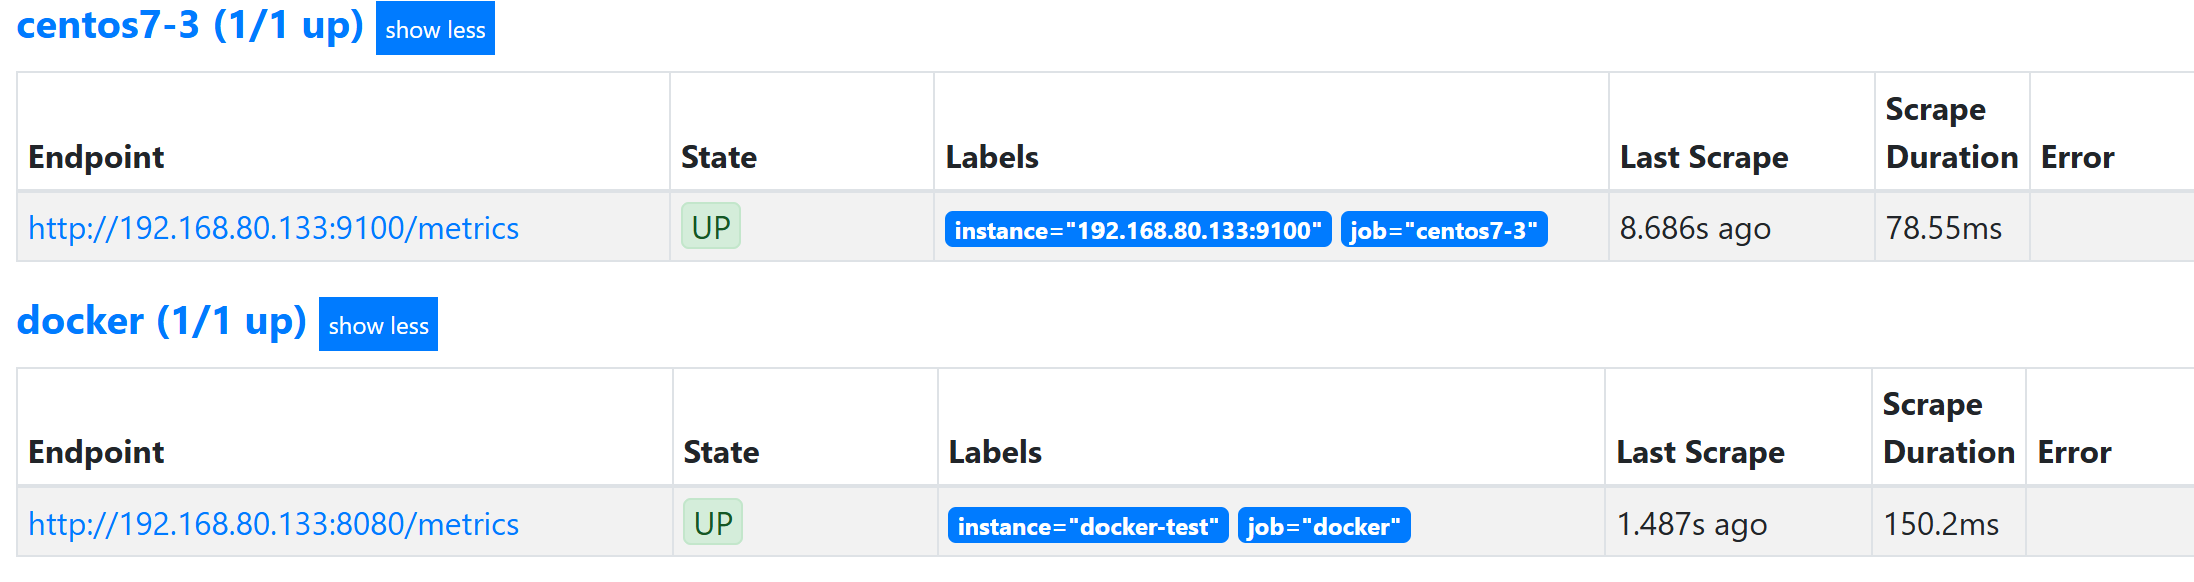
3.2 发现多了docker这个监控指标

码道开发者社区,聚焦华为云码道 CodeArts 代码智能体,沉淀 Agent、Skill、鸿蒙开发实战内容,供开发者查阅资料、交流技术、分享工程实践
更多推荐


 5
5 0
0- 0


 已为社区贡献12条内容

所有评论(0)