MySQL实战篇05:MySQL主从复制Docker实战(上)——1主2从集群搭建与问题解决
作者:进击的圆儿
日期:2025年10月10日
标签:MySQL主从复制Docker实战问题排查
📑 目录

🎯 前言:从Docker容器到主从复制
在上一篇《Docker入门实战》中,我成功搭建了1主2从的MySQL容器环境:
✅ mysql-master (端口3307)
✅ mysql-slave1 (端口3308)
✅ mysql-slave2 (端口3309)
但此时,这3个MySQL实例是完全独立的,互不影响。
今天的目标:
- 配置Master和Slave的主从复制关系
- 实现数据自动同步
- 解决配置过程中遇到的3个真实问题
这篇博客记录了我从零配置主从复制的全过程,包括踩坑和解决方案。
📚 第一部分:主从复制核心原理
为什么需要主从复制?
在配置之前,先想一个问题:
Q:单机MySQL有什么问题?为什么需要主从复制?
我的思考场景:
假设我的cpp-chat项目上线后:
用户量:100万
总QPS:15000
- 读操作(SELECT):12000(80%)
- 写操作(INSERT/UPDATE):3000(20%)

单机MySQL:
- CPU:90%
- 磁盘IO:接近上限
单机MySQL的3大问题:
| 问题 | 影响 | 解决方案 |
|---|---|---|
| 性能瓶颈 | 读写集中在1台机器,压力大 | 读写分离 |
| 单点故障 | Master宕机,服务全部不可用 | 高可用(Slave提升为Master) |
| 备份影响性能 | 直接备份Master,影响线上服务 | 从Slave备份 |
主从复制的作用:
Master(1台) → 处理所有写操作
   ↓ binlog复制
Slave(多台) → 处理所有读操作

性能提升:3倍(1写+2读)
可用性:Master宕机,Slave顶上
主从复制架构
三大线程工作流程
在学习过程中,我遇到了一个关键问题:
Q:主从复制最核心的3个线程分别是什么?它们各自负责什么工作?
我的理解过程:
3个线程详解:
| 线程 | 位置 | 作用 | 关键点 |
|---|---|---|---|
| Binlog Dump线程 | Master | 读取binlog,发送给Slave | Master的"发件人" |
| IO线程 | Slave | 接收binlog,写入relay log | Slave的"收件人" |
| SQL线程 | Slave | 读取relay log,重放SQL | Slave的"执行者" |
我的疑问:
Q:为什么不让Slave直接从Master读binlog并执行,而要搞个relay log中转?
我的理解:
- 直接的话,如果网络断了或出现故障,从库无法处理
- relay log拉取到本地后:
- 本地持久化 → 网络断了也能继续执行
- 解耦IO和执行 → IO线程专心拉取,SQL线程慢慢执行
- 故障恢复 → 记录了"已拉取位置"和"已执行位置"
🔧 第二部分:Master配置
步骤1:检查binlog状态
理解binlog的作用:
Q:如果Master没开binlog,会怎样?
我的回答:
- IO线程无法读取binlog
- 导致从库没有办法去执行SQL线程
- SQL重放失败
结论:binlog是主从复制的"数据源",没有它复制无法进行!
进入Master容器:
# 进入Master容器
PS D:\pythontest\c++_learn> docker exec -it mysql-master bash
bash-5.1#

# 检查binlog状态
bash-5.1# mysql -uroot -proot123 -e "SHOW VARIABLES LIKE 'log_bin';"
mysql: [Warning] Using a password on the command line interface can be insecure.
+---------------+-------+
| Variable_name | Value |
+---------------+-------+
| log_bin       | ON    |  ← binlog已开启 ✅
+---------------+-------+
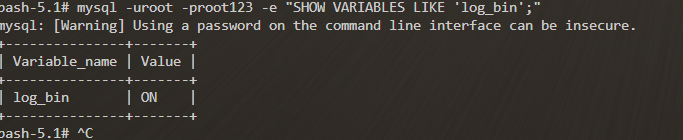
✅ MySQL 8.0默认已经开启binlog!
步骤2:创建复制用户
在创建之前,我遇到了一个问题:
Q:为什么要单独创建一个"复制用户",不能直接用root吗?
我最初的回答: “为了安全性?”
深入理解后:
这是最小权限原则!
root用户权限:
├─ 创建/删除数据库  ✅
├─ 创建/删除用户    ✅
├─ 修改配置         ✅
├─ 读取所有数据     ✅
└─ SHUTDOWN服务器   ✅  ← 超级权限!

复制用户权限:
└─ REPLICATION SLAVE  ← 只能读取binlog,仅此而已!
安全场景:
如果Slave服务器被黑客攻破:

用root(危险):
  黑客拿到root密码
    ↓
  连接Master
    ↓
  DROP DATABASE production;  💥
  SHUTDOWN;                  💥

用复制用户(安全)✅:
  黑客拿到复制用户密码
    ↓
  连接Master
    ↓
  只能读binlog,无法执行任何破坏操作 ✅
创建复制用户:
# 创建用户
bash-5.1# mysql -uroot -proot123 -e "CREATE USER 'repl'@'%' IDENTIFIED BY 'repl123';"
mysql: [Warning] Using a password on the command line interface can be insecure.

# 授予复制权限
bash-5.1# mysql -uroot -proot123 -e "GRANT REPLICATION SLAVE ON *.* TO 'repl'@'%';"
mysql: [Warning] Using a password on the command line interface can be insecure.
✅ 没有报错就是成功!
参数说明:
'repl'@'%':用户名repl,@'%'表示允许从任何主机连接- 为什么用
@'%'?因为我们有Slave1和Slave2,用%可以让所有Slave都能连接
步骤3:查看Master状态

关键信息:
File: binlog.000002= Master当前的binlog文件名Position: 689= binlog的当前位置
这两个值非常重要!Slave连接时需要告诉Master:
“我从
binlog.000002的第689个字节开始读”
退出Master容器:
bash-5.1# exit
exit
PS D:\pythontest\c++_learn>
🔄 第三部分:Slave配置
步骤1:配置连接参数
在配置之前,先理解原理:
Q:Slave要连接Master,需要告诉MySQL哪些信息?
我的思考:
Master信息:
- 容器名:
mysql-master - 复制用户:
repl - 用户密码:
repl123 - binlog文件:
binlog.000002 - binlog位置:
689
Q:如果不告诉Slave"从binlog.000002的689位置开始读",会发生什么?
我的回答:
- 不告诉的话可能会乱读,大概率从头开始
- 那么可能会导致冲突
- 不能从头读,可能有很多东西是相同的会重复,引发SQL冲突
场景示例:
Master的binlog历史记录:
binlog.000001:
  位置0-1000:CREATE DATABASE test;
  位置1001-2000:CREATE TABLE users(id INT);
  位置2001-3000:INSERT INTO users VALUES(1);

binlog.000002:
  位置0-688:系统初始化操作
  位置689:← 我们的起点(从这里开始同步)

如果Slave从头读(位置0):
  ↓
重复执行CREATE DATABASE test; ❌
重复执行CREATE TABLE users; ❌
重复执行INSERT VALUES(1); ❌
  ↓
主键冲突、数据重复!
进入Slave1容器:
PS D:\pythontest\c++_learn> docker exec -it mysql-slave1 bash
bash-5.1#
执行CHANGE MASTER命令:
bash-5.1# mysql -uroot -proot123 -e "CHANGE MASTER TO \
  MASTER_HOST='mysql-master', \
  MASTER_USER='repl', \
  MASTER_PASSWORD='repl123', \
  MASTER_LOG_FILE='binlog.000002', \
  MASTER_LOG_POS=689;"
mysql: [Warning] Using a password on the command line interface can be insecure.
✅ 配置成功!
步骤2:启动复制线程
bash-5.1# mysql -uroot -proot123 -e "START SLAVE;"
mysql: [Warning] Using a password on the command line interface can be insecure.
✅ 启动成功!
步骤3:验证复制状态
bash-5.1# mysql -uroot -proot123 -e "SHOW SLAVE STATUS\G" | grep -E "Slave_IO_Running|Slave_SQL_Running|Seconds_Behind_Master"
mysql: [Warning] Using a password on the command line interface can be insecure.
              Master_Log_File: binlog.000002
          Read_Master_Log_Pos: 689
             Slave_IO_Running: Connecting  ← 正在连接中
            Slave_SQL_Running: Yes        ← SQL线程正常 ✅
        Seconds_Behind_Master: NULL
看到 Connecting 表示IO线程正在尝试连接Master…
等待几秒后再次检查:
bash-5.1# mysql -uroot -proot123 -e "SHOW SLAVE STATUS\G" | grep -E "Slave_IO_Running|Slave_SQL_Running|Last_IO_Error"
mysql: [Warning] Using a password on the command line interface can be insecure.
             Slave_IO_Running: Connecting
            Slave_SQL_Running: Yes
                Last_IO_Error: Error connecting to source 'repl@mysql-master:3306'.
This was attempt 2/86400, with a delay of 60 seconds between attempts.
Message: Authentication plugin 'caching_sha2_password' reported error:
Authentication requires secure connection.
🚨 出现错误了!
🐛 第四部分:问题排查与解决
问题1:认证插件不兼容
错误信息:
Authentication plugin 'caching_sha2_password' reported error:
Authentication requires secure connection.
问题分析:
MySQL 8.0的认证问题:
MySQL 8.0默认使用 caching_sha2_password 认证插件
  ↓
这个插件要求"安全连接"(SSL加密)
  ↓
但我们没有配置SSL证书
  ↓
Slave无法连接Master ❌
解决方案:修改repl用户的认证方式
步骤1:退出Slave,回到宿主机
bash-5.1# exit
exit
PS D:\pythontest\c++_learn>
步骤2:修改Master上的repl用户认证方式
PS D:\pythontest\c++_learn> docker exec mysql-master mysql -uroot -proot123 \
  -e "ALTER USER 'repl'@'%' IDENTIFIED WITH mysql_native_password BY 'repl123';"
mysql: [Warning] Using a password on the command line interface can be insecure.
✅ 修改成功!
步骤3:重启Slave复制线程
PS D:\pythontest\c++_learn> docker exec mysql-slave1 mysql -uroot -proot123 \
  -e "STOP SLAVE; START SLAVE;"
mysql: [Warning] Using a password on the command line interface can be insecure.
步骤4:再次检查状态
PS D:\pythontest\c++_learn> docker exec mysql-slave1 mysql -uroot -proot123 \
  -e "SHOW SLAVE STATUS\G" | Select-String "Slave_IO_Running|Slave_SQL_Running|Last_IO_Error"
mysql: [Warning] Using a password on the command line interface can be insecure.

             Slave_IO_Running: No   ← 还是有问题!
            Slave_SQL_Running: Yes
                Last_IO_Error: Fatal error: The replica I/O thread stops because
source and replica have equal MySQL server ids...
🚨 新的错误出现了!
问题2:server_id冲突
错误信息:
Fatal error: The replica I/O thread stops because source and replica
have equal MySQL server ids; these ids must be different
问题分析:
Master的server_id: 1
Slave的server_id: 1  ← 相同了!

MySQL要求:
  主从复制中,每个MySQL实例必须有唯一的server_id
  就像身份证号,不能重复!
解决方案:修改Slave的server_id
步骤1:检查Master的server_id
PS D:\pythontest\c++_learn> docker exec mysql-master mysql -uroot -proot123 \
  -e "SHOW VARIABLES LIKE 'server_id';"
mysql: [Warning] Using a password on the command line interface can be insecure.
Variable_name   Value
server_id       1
步骤2:修改Slave1的server_id为2
PS D:\pythontest\c++_learn> docker exec mysql-slave1 mysql -uroot -proot123 \
  -e "SET GLOBAL server_id=2;"
mysql: [Warning] Using a password on the command line interface can be insecure.
✅ 修改成功!
步骤3:重启Slave复制线程
PS D:\pythontest\c++_learn> docker exec mysql-slave1 mysql -uroot -proot123 \
  -e "STOP SLAVE; START SLAVE;"
mysql: [Warning] Using a password on the command line interface can be insecure.
步骤4:检查状态
PS D:\pythontest\c++_learn> docker exec mysql-slave1 mysql -uroot -proot123 \
  -e "SHOW SLAVE STATUS\G" | Select-String "Slave_IO_Running|Slave_SQL_Running"
mysql: [Warning] Using a password on the command line interface can be insecure.

             Slave_IO_Running: Yes  ← IO线程正常了! ✅
            Slave_SQL_Running: No   ← SQL线程停止了! ❌
🚨 又有新问题!
问题3:SQL线程执行失败
错误信息:
PS D:\pythontest\c++_learn> docker exec mysql-slave1 mysql -uroot -proot123 \
  -e "SHOW SLAVE STATUS\G" | Select-String "Last_SQL_Error"
mysql: [Warning] Using a password on the command line interface can be insecure.

               Last_SQL_Error: Coordinator stopped because there were error(s)
in the worker(s). The most recent failure being: Worker 1 failed executing
transaction 'ANONYMOUS' at source log binlog.000002, end_log_pos 971...
问题分析:
这可能是因为之前的配置冲突导致的SQL执行错误。
解决方案:重置Slave,从最新位置开始
步骤1:查看Master当前状态
PS D:\pythontest\c++_learn> docker exec mysql-master mysql -uroot -proot123 \
  -e "SHOW MASTER STATUS;"
mysql: [Warning] Using a password on the command line interface can be insecure.
File    Position        Binlog_Do_DB    Binlog_Ignore_DB        Executed_Gtid_Set
binlog.000002   971
Master当前位置:binlog.000002, Position: 971
步骤2:重置Slave并重新配置
PS D:\pythontest\c++_learn> docker exec mysql-slave1 mysql -uroot -proot123 -e \
  "STOP SLAVE;
   RESET SLAVE;
   CHANGE MASTER TO
     MASTER_HOST='mysql-master',
     MASTER_USER='repl',
     MASTER_PASSWORD='repl123',
     MASTER_LOG_FILE='binlog.000002',
     MASTER_LOG_POS=971;
   START SLAVE;"
mysql: [Warning] Using a password on the command line interface can be insecure.
✅ 重置并重新配置成功!
步骤3:验证状态(期待双Yes!)
PS D:\pythontest\c++_learn> docker exec mysql-slave1 mysql -uroot -proot123 \
  -e "SHOW SLAVE STATUS\G" | Select-String "Slave_IO_Running|Slave_SQL_Running|Seconds_Behind_Master"
mysql: [Warning] Using a password on the command line interface can be insecure.

             Slave_IO_Running: Yes   ← IO线程正常 ✅
            Slave_SQL_Running: Yes   ← SQL线程正常 ✅
        Seconds_Behind_Master: 0     ← 主从延迟0秒 ✅

🎉 完美!Slave1主从复制成功启动!
快速配置Slave2
有了Slave1的经验,Slave2配置就很简单了:
PS D:\pythontest\c++_learn> docker exec mysql-slave2 mysql -uroot -proot123 -e \
  "SET GLOBAL server_id=3;
   CHANGE MASTER TO
     MASTER_HOST='mysql-master',
     MASTER_USER='repl',
     MASTER_PASSWORD='repl123',
     MASTER_LOG_FILE='binlog.000002',
     MASTER_LOG_POS=971;
   START SLAVE;"
mysql: [Warning] Using a password on the command line interface can be insecure.
验证Slave2状态:
PS D:\pythontest\c++_learn> docker exec mysql-slave2 mysql -uroot -proot123 \
  -e "SHOW SLAVE STATUS\G" | Select-String "Slave_IO_Running|Slave_SQL_Running|Seconds_Behind_Master"
mysql: [Warning] Using a password on the command line interface can be insecure.

             Slave_IO_Running: Yes   ← IO线程正常 ✅
            Slave_SQL_Running: Yes   ← SQL线程正常 ✅
        Seconds_Behind_Master: 0     ← 主从延迟0秒 ✅
🎉 Slave2也成功了!1主2从集群完全配置好了!
📝 写在最后
今天的收获
通过这次主从复制实战,我掌握了:
✅ 核心概念
- 主从复制的3大线程:Binlog Dump、IO、SQL
- binlog和relay log的作用
- server_id的重要性
✅ 实战技能
- 配置Master:开启binlog、创建复制用户
- 配置Slave:CHANGE MASTER、START SLAVE
- 排查问题:查看SHOW SLAVE STATUS
✅ 问题解决能力
- 问题1:认证插件不兼容 → 修改为
mysql_native_password - 问题2:server_id冲突 → 设置唯一的server_id
- 问题3:SQL线程执行失败 → RESET SLAVE重新开始
遇到问题时的排查思路
生产环境注意事项
| 配置项 | 测试环境 | 生产环境 |
|---|---|---|
| server_id | 临时设置 | 写入配置文件(永久生效) |
| 复制用户 | 简单密码 | 强密码 + 定期轮换 |
| SSL连接 | 未配置 | 建议开启(数据加密) |
| binlog格式 | 默认ROW | 根据场景选择(ROW/STATEMENT/MIXED) |
| 监控 | 手动检查 | 自动监控(Prometheus + Grafana) |
下一步计划
主从复制已经配置好了,下一步要做的是:
-
验证数据同步
- Master写入数据
- Slave查询验证
-
测试读写分离
- 配置Slave为只读模式
- 测试Slave拒绝写操作
-
主从延迟测试
- 批量插入数据
- 观察Seconds_Behind_Master
-
三种复制模式选择
- 异步复制 vs 半同步 vs 全同步
- 不同场景的选择策略
这些内容将在下一篇博客《MySQL主从复制Docker实战(下)》中详细记录!
参考资料
如果这篇文章对你有帮助,欢迎点赞收藏!
有问题欢迎在评论区讨论~
系列文章:

码道开发者社区,聚焦华为云码道 CodeArts 代码智能体,沉淀 Agent、Skill、鸿蒙开发实战内容,供开发者查阅资料、交流技术、分享工程实践
更多推荐



 16
16 0
0- 0


 已为社区贡献9条内容

所有评论(0)